Detailed Anycubic Photon Mono M7 Max Review for Beginners + Free Air Duct 3D Model

Anycubic Photon Mono M7 Max Review for Beginners
Serendipity, how it all started…
Anycubic reached out to us to review their newest and largest resin printer. We were thrilled to check out this printer, especially since we were in the market for one.
While resin printers weren’t on our minds as much as filament-based printers, the high level of detail and speed made us reconsider.
So, we graciously accepted the printer at no cost and, best yet, with zero direction from Anycubic other than they would like to hear our thoughts on it.
If you’re anything like me and tend to research the hell out of anything you’re thinking of buying, then you may appreciate this review.
I’m hoping this review can answer some of the questions you have as a newbie to 3D printing, like the ones I had.
I was able to collect a lot of great insight from some great minds in the resin printing community. It is also my intent that you may use this review as a collection of information, all linked here for your convenience.
Anycubic Photon Mono M7 Max is Versatile
It all started months ago when I was researching 3D printing and how I could use it to aid in woodworking or around the house.
It’s amazing how far 3D printers have come since they first broke into the consumer market.
It used to be that 3D printers, with their complexity and constant need for adjustments and repairs, reserved them for the more nerdy of us — 3D Printer Enthusiasts.
These were individuals who prided themselves in tweaking and adjusting the 3D printers to improve reliability and squeeze the most performance possible out of the printers.
This turned the hobby into working on the printer itself and not what it could print.
While I can appreciate this aspect of 3D printing, I’m not interested in taking on 3D printers as a hobby. Instead, I want to print cool and or functional stuff.
As a Gen-X card-carrying member, I want to just load a file onto the printer and wait for it to be done.
Good news for you and me, we’re finally able to do this with most 3D Printing manufacturers. Anycubic is no exception, as they provide affordable printers and a free online 3D model library, Makeronline.
With this free model library at your fingertips, you don’t need to know how to 3D model.
You can just browse the library on your PC or their free App and find the model that tickles your fancy.
Pair this with their free 3D slicer software (Anycubic Photon Workshop), and you have everything you need software-wise to get started.
The Basics
Resin printing is a form of additive manufacturing. This is where you add material in a controlled manner to create an object (3D model).
In essence, the resin liquid it uses is photosensitive and when exposed to UV light it hardens. The 3D Printer uses this resin property to expose one object layer at a time.
Geoff the VogMan made a very informative 6 minute video detailing how this process works.
Check it out if you’d like some in-depth explanation of this process.
As you can imagine, you’re going to need an object to print. You can find these objects, mostly in the form of an *.STL or *.3MF file in many places on the net, either free or at a cost.
Best bet is to start with your manufacturer’s 3D model library, which is usually free. As mentioned earlier, Anycubic has a nice free model library on their website — Makeronline.
Once you have the said object, you’ll need to “slice” every layer that the printer will use to make it.
Luckily, this is a relatively simple endeavor using the provided “Slicer” – Anycubic Photon Workshop.
And don’t worry, it’s not hard at all, you simply click a button and save the file it produces.

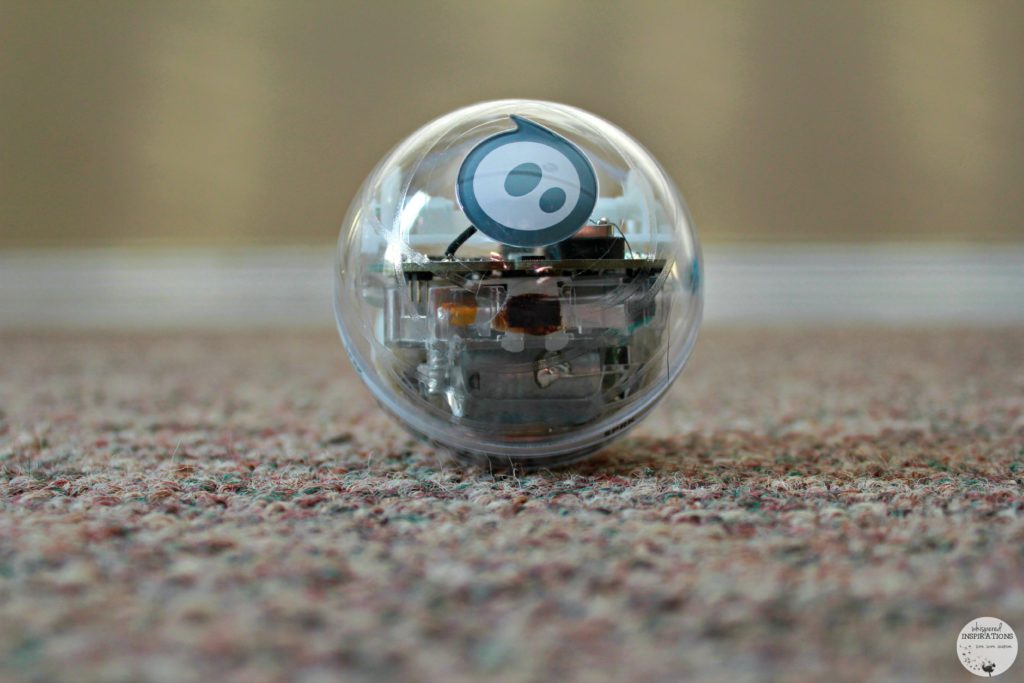
Well-Packaged
The attention to detail in the packaging was evident throughout the box.
Everything was packed very safely and efficiently.
I do wonder if that little smiley face started as a handle and evolved into something happier.

You’ll Need Some Space — Stats
The Anycubic Photon Mono M7 Max is very large. Measuring 16.7” (425mm) Width x 14.3” (362mm) Depth x 25.7” (652mm) Height and weighing 53 lbs (24Kg)
My first impression of this machine is that it is solidly built. The majority of it is made of metal, giving it that industrial feel of durability.
Specifications
Here are the specifications, referencing their website but adding unit conversions where needed:
| Build Volume | 11.7” (298mm) Width x 6.5” (164mm) Depth x 11.8” (300mm) Height 14.7L |
| Printing Speed | Standard Resin 0.05mm layer height: ≤31mm/h peek speed Standard Resin 0.1mm layer height: ≤63mm/h peek speed High-Speed Resin 0.1mm layer height: ≤86mm/h peek speed |
| Layer Height | 0.01-0.15mm |
| LCD Screen | 13.6-inch Mono LCD |
| LCD Resolution | 7K |
| XY Resolution | 46*46μm (6480 x 3600) |
| Light Source | COB light source+Fresnel lens+Light uniformity algorithm |
| Light Uniformity | ≥ 90% |
| Light Intensity | 4500±500 μw/cm² |
| Release Film | ACF |
| Intelligence Assisted | Yes |
| Air Vent | Yes |
| Dynamic Temperature Control Resin Vat | Yes |
| Resin Auto-Fill Unit | Yes |
| Display Screen | 4.3-inch touch screen |
| Anycubic APP | Yes |
| Machine Leveling | 4-point manual leveling |
| Slicing Software | Photon Workshop & Chitubox & Lycheeslicer(Q4) |
| File Transfer | USB & WiFi (2.400 ~ 2.4835 GHz, Work Mode AP, STA, AP+STA) & LAN MODE(2025 Q1) |
| Product Dimensions | 16.7” (425mm) Width x 14.3” (362mm) Depth x 25.7” (652mm) Height |
| Package Dimensions | Package Dimen20.5” (520mm) Width x 19.3” (490mm) Depth x 30.9” (785mm) Height |
| Net weight | 53 lbs (24Kg) |
| Operating Temperature | 46°F – 104°F (8°C – 40°C) |
| Operating Humidity | 20% – 50% |

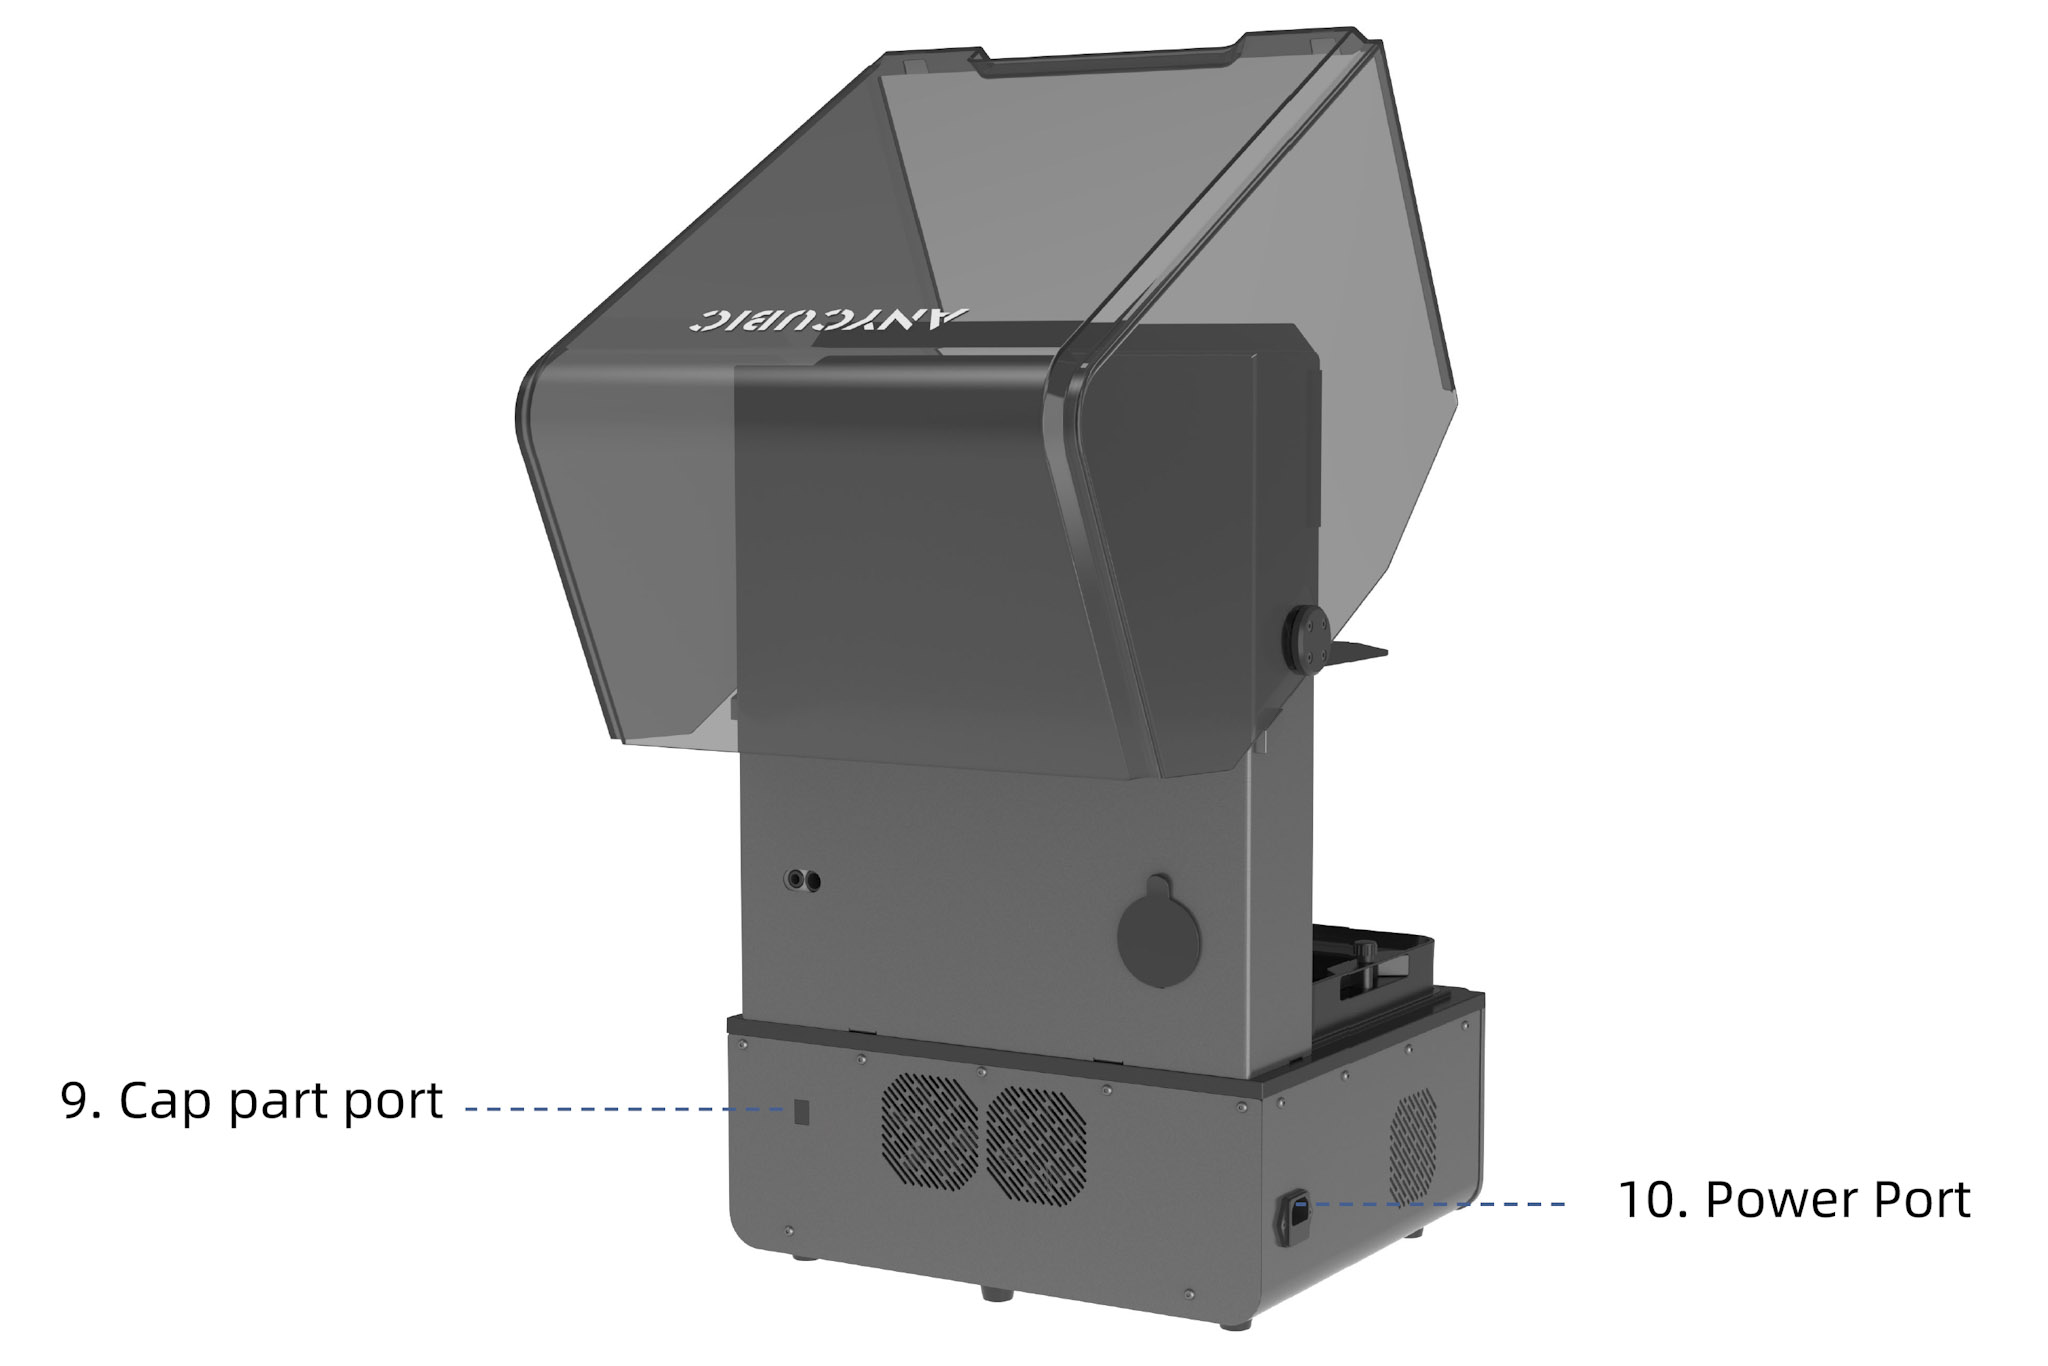
Visualize It
Here’s a great diagram from Anycubic’s printer manual detailing the anatomy of the M7 Max printer. Please reference these when you read through this review to help you visualize a certain component.
What’s in the Box?

Safety
According to the manufacturer, there are a few key safety items to address:
- UV Light — The printer uses UV light and this can be harmful to your eyes if you stare at it, so don’t. Better yet, pick up some UV Safety Glasses.
- Vapors or fumes from the resin can be irritating. Only use the printer in an open and well-ventilated area. On the topic of resin, you should also invest in a pack of Nitrile gloves (NOT latex as they can be compromised by the resin).
- There are printer components that can cause injury. As you may know, the printer has a platform that moves up and down. Stay clear of it. It’s best practice to operate this platform with the lid closed.
- Scrapers are sharp. We still should be reminded not to point sharp edges towards you when using the provided scraper. Particularly when peeling parts off the build plate. Don’t put your other hand on the other side of the model as you scrape towards it.
Calibration
Before printing the fun stuff, we need to get this out of the way. If there’s something I learned throughout countless resin printing tutorials I’ve viewed was that I must calibrate my machine and resin combo.
It’s important to do this before I print anything meaningful.
This rings true from my woodworking hobby, where having a calibrated machine is vital to producing great results.
Keep in mind that the combination of machine and material is never the same from any manufacturer, as there will always be normal variances.
As such, we’ll start out with calibrating two of the most crucial settings for resin printing — Build Plate (Print Platform) leveling and exposure time.
Step 1 — Build Plate (Print Platform) Leveling
The Build Plate plays a very significant role in your 3D printing experience. If it is not properly leveled against your screen, it can lead to print failures.
Fortunately, Anycubic makes it an easy process with an on-screen wizard to walk you through the leveling process.
After you’ve removed all protective films as indicated within the manual, go to Page 15.
Follow the instructions on how to level your Build Plate using the Allen keys they’ve provided and the on-screen wizard seen below.


Here is the last step of the Leveling Calibration process, the Leveling Paper pull test. All tools were provided, from the Allen wrench for the Build Plate to the paper itself.
Step 2 – Exposure Time Calibration
There are so many freely available exposure tests out there that it can be overwhelming when you’re getting started.
To give you an idea, “3D Printed Tabletop” made a nice video of just how many of these tests are out there.
To keep things simple, I like to start with the manufacturer’s method of calibrating their machine. In the case of Anycubic, they developed a “Resin Exposure Range Finder” test (RERF for short).
This is a great built-in test that lets you print eight different exposure time samples in one shot.
They include your printer’s specific RERF file within the provided USB stick.
You’ll want to stick to the provided file when running the RERF test as the location of the 3D models in relation to the build plate and its number sequence are unique to your printer.
When you open up this file in your slicer, you can set the normal exposure time for the file and save it.
That normal exposure time will be the one used for your #1 sample.
The next sequence of samples will automatically have an exposure time of 0.25 second higher than the first. So, say your sample #1 is 2.0s, then sample #2 is 2.25s and so on.
In the Anycubic Photon Workshop slicer application, you can find the normal exposure time setting under “Slice Parameter” on the bottom right of the screen (below).

When you click on “Slice Parameter” the pop-up dialog below will appear. Here you’ll find an entry box for the “Normal Exposure Time(s)”.
This setting typically dictates the Exposure Time for all 3D Models on your screen.
But Anycubic designed it so that the machine would recognize the RERF file and change the exposure time per all 8 models.

Overexposed or Underexposed?
As my research uncovered (see “Research” section at the bottom of this article), it’s better to be over-exposed (higher exposure time) than under-exposed.
You’re more likely to have a successful print at the expense of losing some detail.
This detail can be sharpened/improved by lowering your exposure time gradually in future prints. This is better than the alternative where you end up with failed prints and gunk to clean up on your machine.
The first resin I’ll be using was one provided by Anycubic, the “Water Wash Resin+” in white.
The manufacturer’s recommended normal exposure time for Standard Speed is 2.2 seconds. The included file is sliced to have a normal exposure time of 1.7 seconds which is two increments lower than the recommended 2.2s.
This is a good point to start to try and get some under-exposed samples for review.
Knowing this, the sample times are as follows: 1.70, 1.95, 2.20, 2.45, 2.70, 2.95, 3.20, 3.45 for samples 1 thru 8 respectively.
The default RERF model used (below) from Anycubic, has several features that let you know if your exposure time is correct.

Sample Left Side
The V-Shaped platform contains several positive features that protrude like pins and platforms. The more pins you see the better the detail you can print. The box with the number 5 on it is for dimensional accuracy and stands for 5mm per side. Also note that the RERF sample number is present above the “Anycubic” text.

Sample Right Side
This side shows more of the negative features that cut away from the surface like holes and slots. The more holes and slots that you see, the better as this means you’re not overexposed. As resin tends to grow if overexposed and would seal up holes or slots.
Anycubic provides some nice instructions on their website for this test. Below is an excerpt from there to show you how to interpret the results below:
- Model A has more holes and fewer cylinders. If you print by the parameter of model A, more details of the model can be printed with a high risk of failure.
- Model B has fewer holes and more cylinders. If you print by the parameter of model B, the model may be printed successfully yet with some details lost.
(A) UNDER-EXPOSED
(B) OVER-EXPOSED

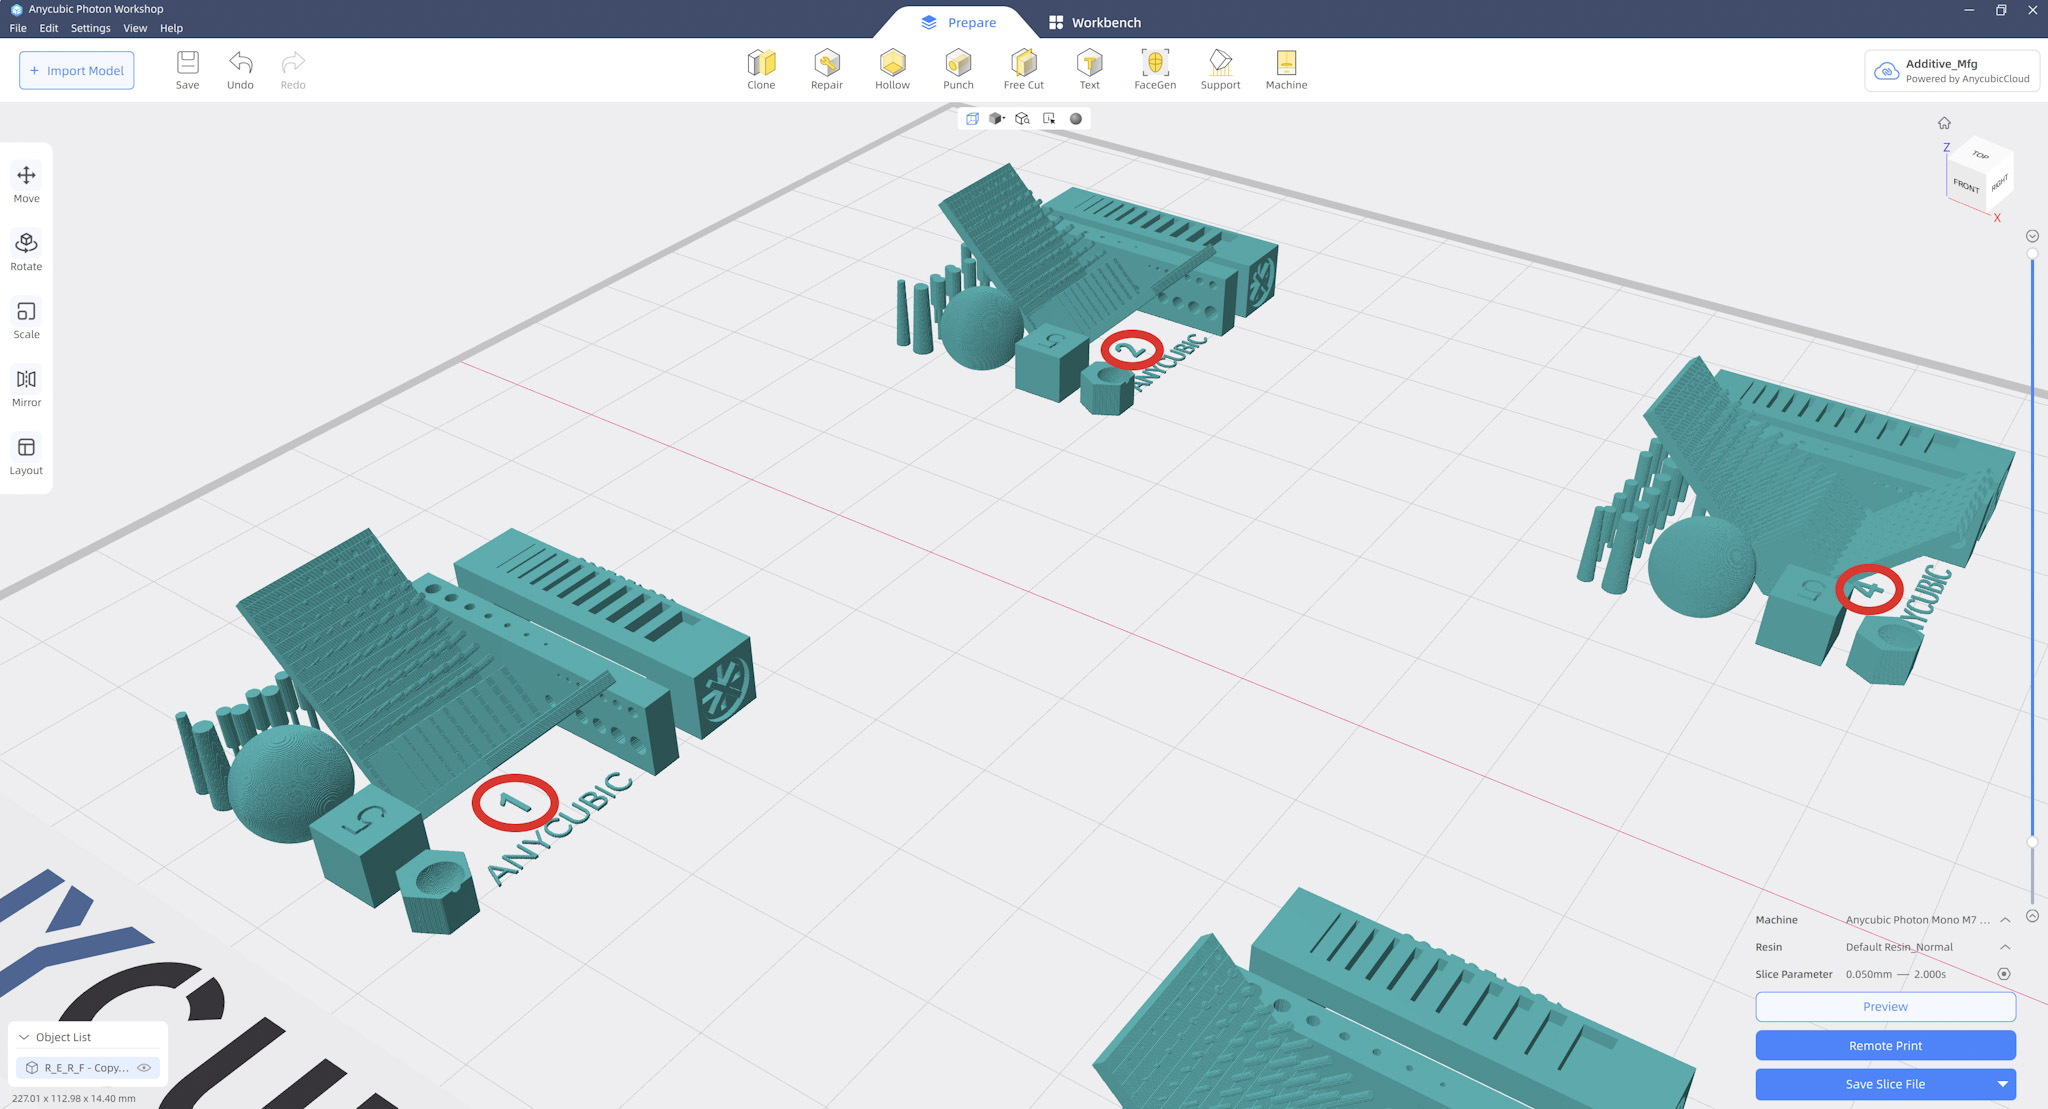
Numbered Samples
Above, you’ll see a screenshot of the Anycubic Photon Workshop with the RERF file opened. I moved the slider on the right up a bit so I could hide the base of the sample.
This is to highlight the sample numbering present and circled in red.
These number labels are very helpful after you’ve printed and removed them off the build plate for cleaning. These numbers will coincide with the 8 different normal exposure times mentioned above.
Printing the Calibration Samples
First, we’ll start by printing the RERF test as detailed earlier. This should give us some nice samples to review to pick out the right exposure time for our resin and printer combo.

In comparing this printer to others online, I can see the huge advantage of having a hinged lid instead of a loose one.
It’s so nice just to pop it up like a hood while you tend to the machine. Especially with such a large hood on the M7 Max.

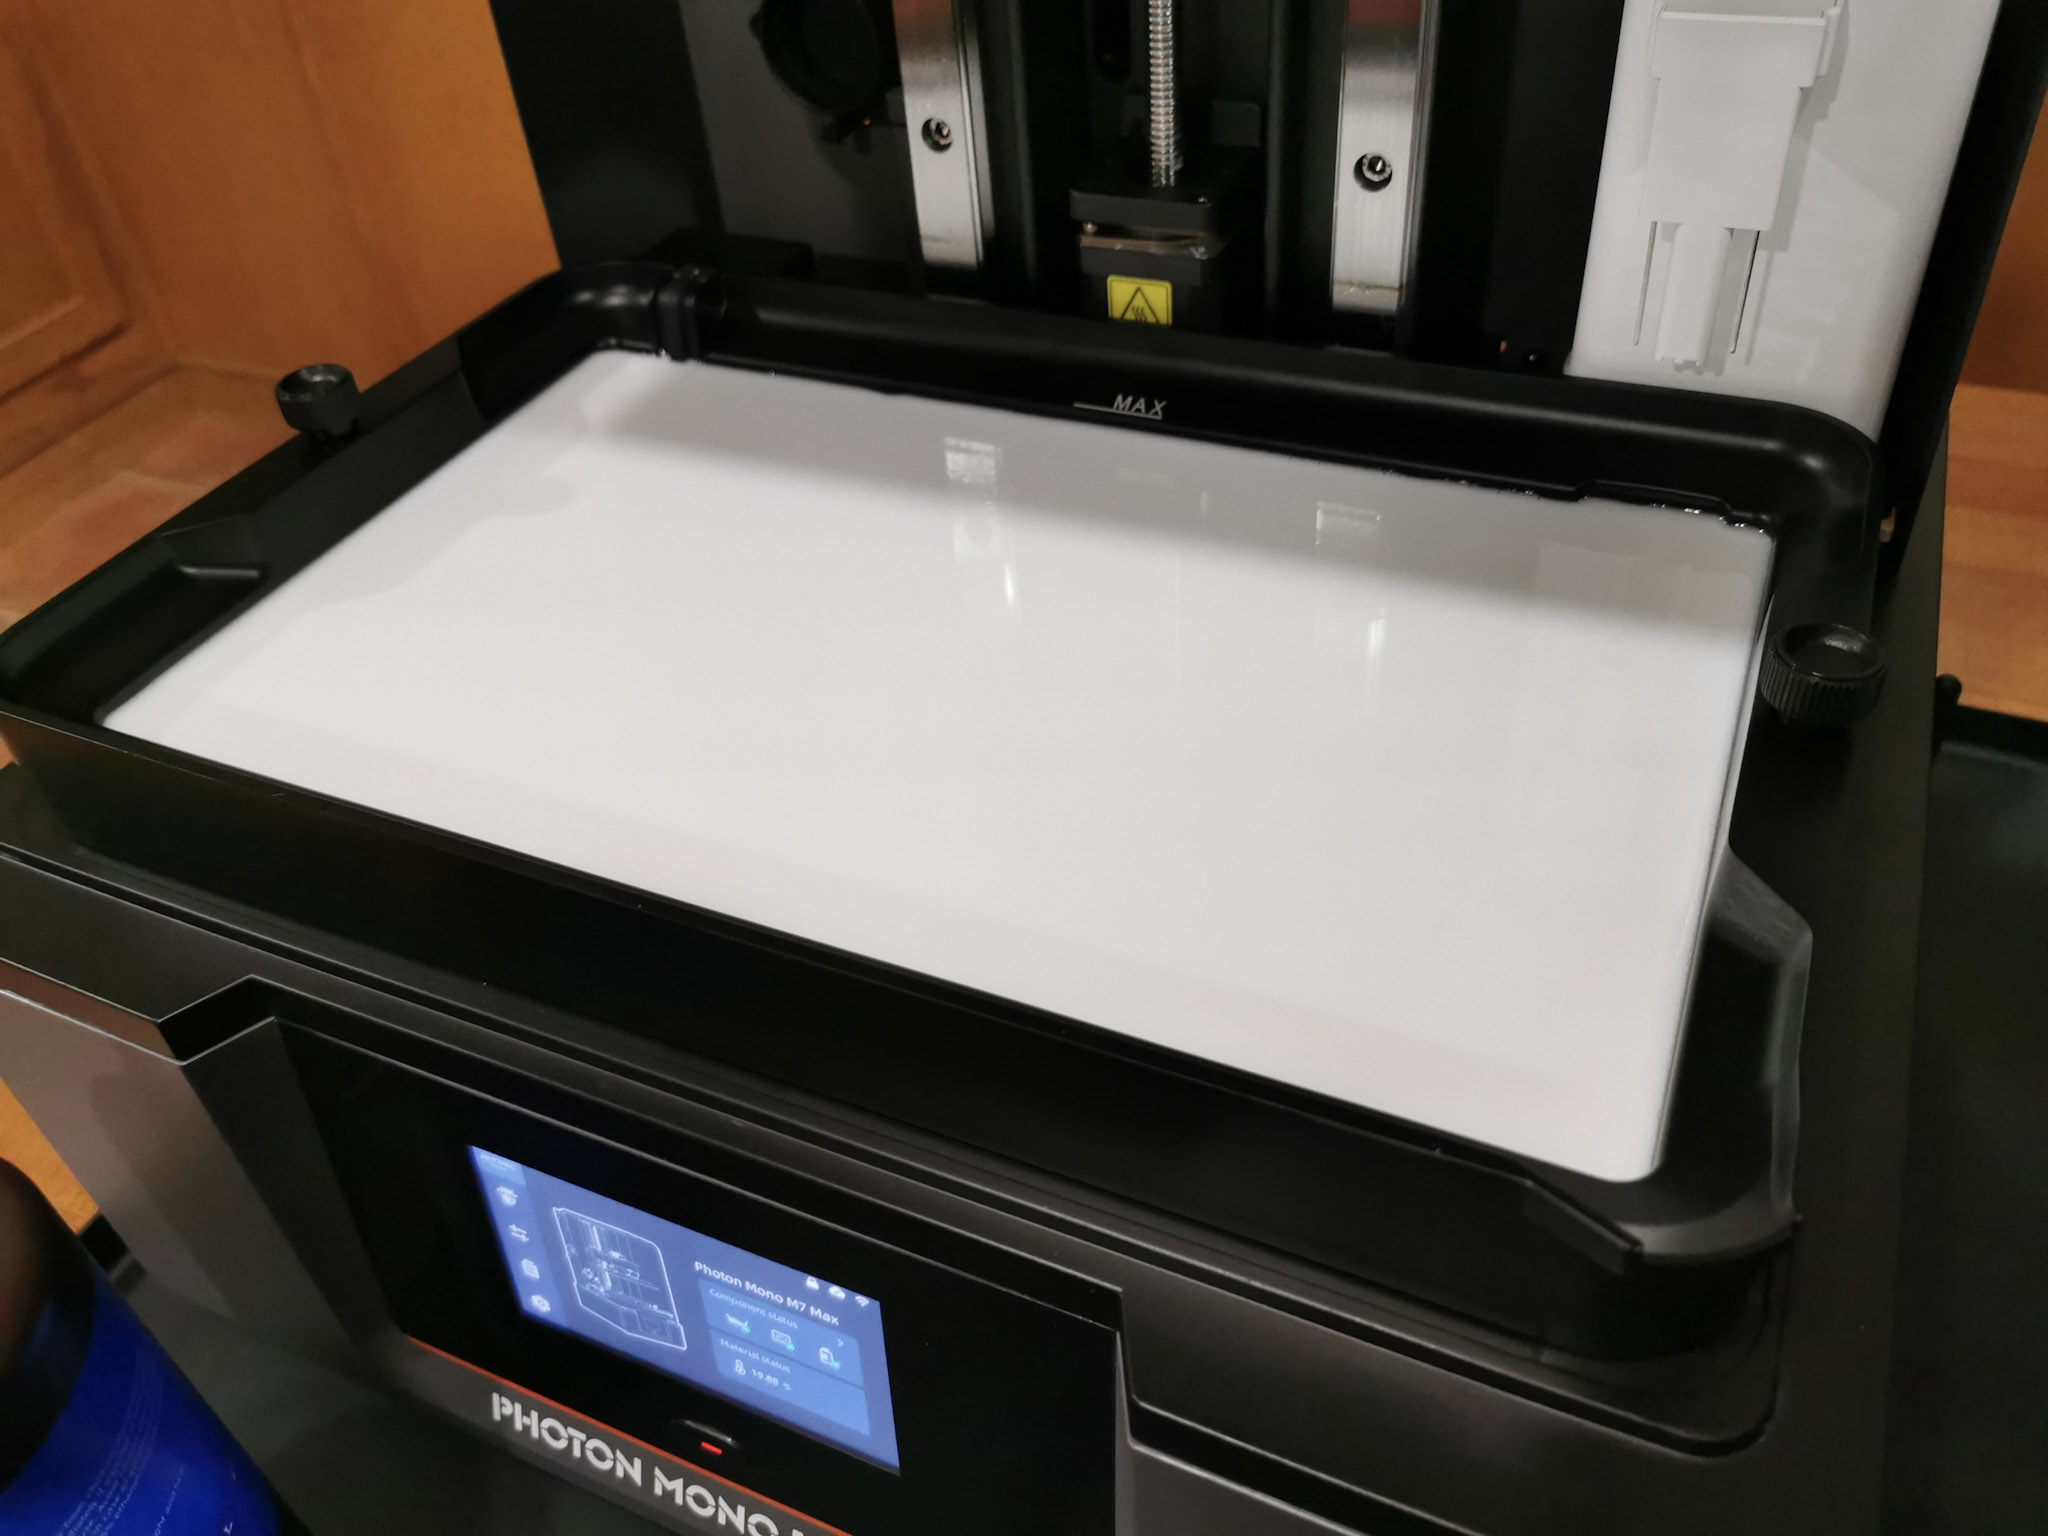
Filling the VAT
Due note, that the capacity of this vat is massive in comparison to most other printers out there. The VAT drank a full bottle of resin and didn’t even hit the Max level line.

Touchscreen
The 4.3” touchscreen provided is really nice. Easy to read and sensitive enough to work well.

Resin Reclamation
Their addition of these hanger brackets that hold the build plate at an angle is a great way to aid in resin reclamation.
It’s also a great way to reduce resin dripping on your work surfaces when moving the build plate around.
When mounting the build plate just ensure that you place the back edge of the handle all the way to the back of the brackets and under the Allen bolt heads as shown above.

Auto-Fill Reclamation System
Unfortunately, I did not utilize this auto-fill/reclamation system. I felt it would have been more work to use and then clean up as I wasn’t planning on using more than one bottle on my initial prints.
However, I can’t wait to use it in the near future on a large print that will use multiple bottles of the same resin.


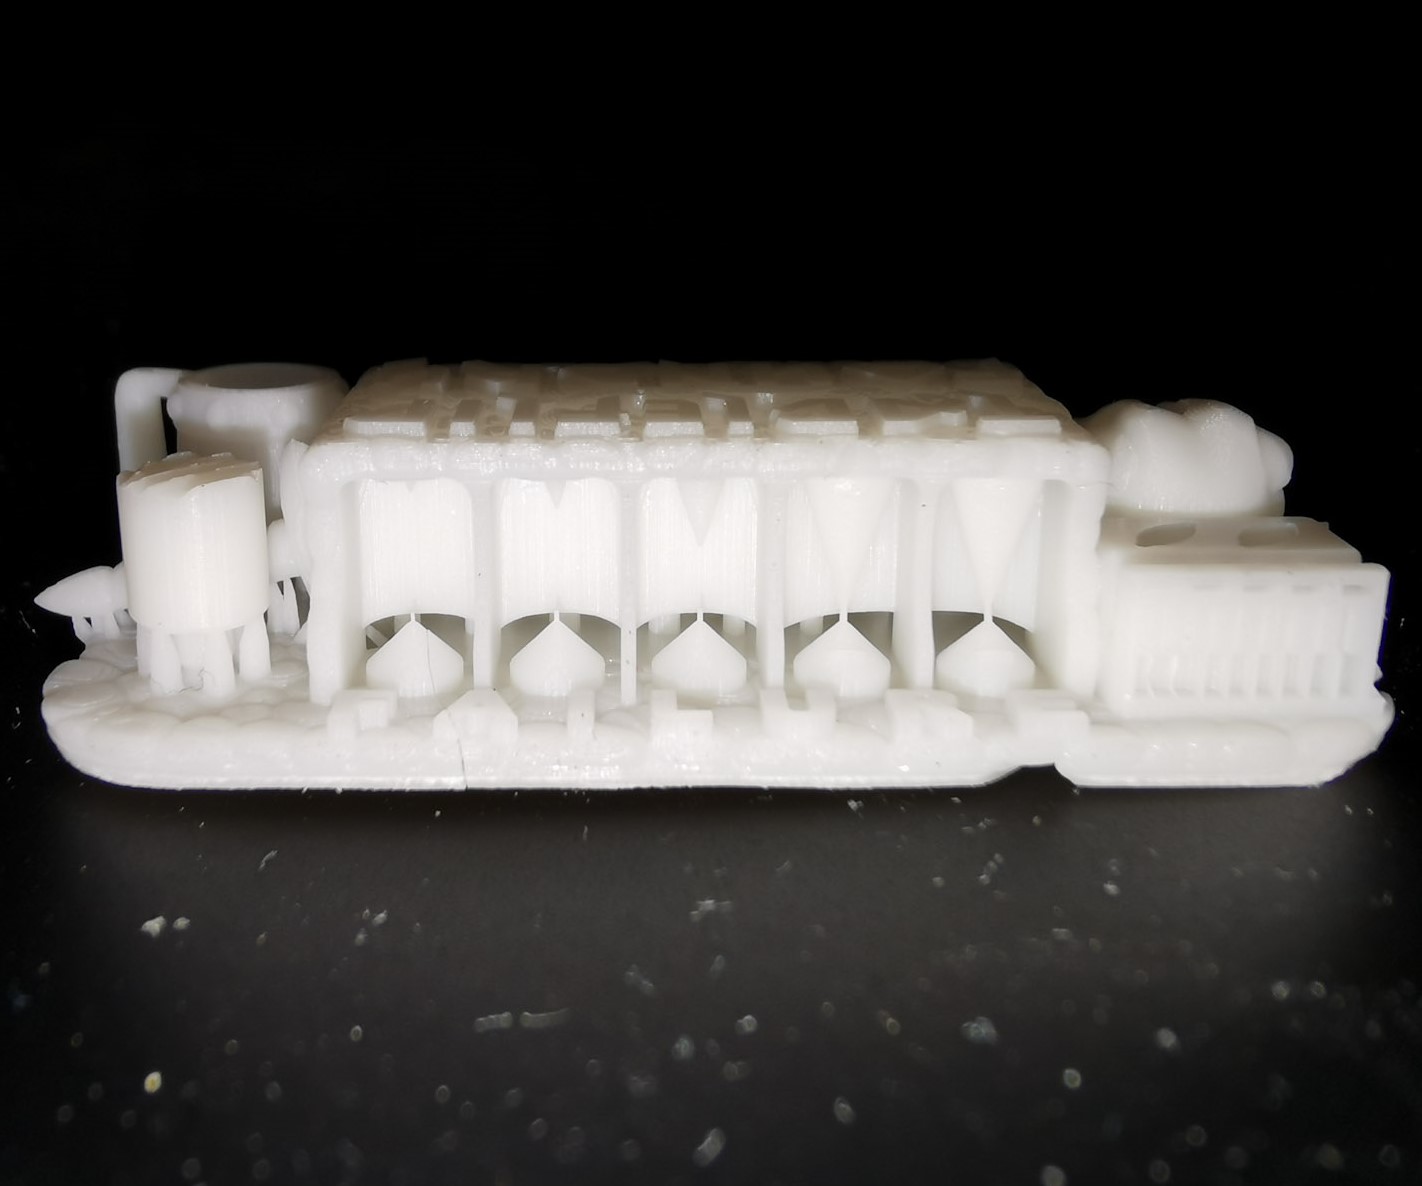
RERF Results
The RERF test ran well, you can see the samples above. Now because I used a Water Wash resin, I was able to use water to do the first rinse of these parts to get the majority of the resin off.
I used two old glass jars, a silicone funnel, and a paper filter for this.
The paper filter, like the ones provided, can help catch any debris in the resin when transferring.

The Anycubic Wash & Cure 3
I did the second rinse in the Anycubic Wash & Cure 3 using 99% Isopropyl Alcohol.
This helps the parts get a more even wash and also dry so much faster than just using water.
The great thing about the Water Wash Resin is that you can extend the life of your Isopropyl Alcohol by only using it as the second and final wash.

RERF Samples
Not gonna lie, at first, I thought I made some sort of mistake because all of the samples looked great to my untrained eye.
Can you see much difference between the eight samples above?
Keep in mind that these samples are very tiny.
And their details are so minuscule that you almost need a loupe to see them. Mind you, it didn’t help that the resin was white.
It was only after I started really looking at specific details and comparing some of the extreme samples that I saw differences.
Remember that the higher the Sample number, the higher the exposure time which makes features grow/expand.
On the topic of expansion, ensure you don’t cure your calibration samples (expose them to UV light).
This will affect the dimensional accuracy of the samples so instead just wash and dry them before inspection.

Sample 7 – 3.20 s
This sample shows signs of overexposure or growth as you can only see six holes open on the platform on the back and center.

Sample 1 – 1.70 s
Meanwhile, this sample shows 32 holes opened, a marked difference in detail.

Sample 6 – 2.95 s
Starting on Sample six and upwards you’ll notice the sphere on the bottom left of the photo actually connecting to the V-shaped platform. This is likely due to overexposure causing features to expand and sometimes touch others.

Sample 1 – 1.70 s
However, the lowest exposure time sample at 1.7 seconds has a gap between the sphere and the platform as intended. You can also spot 9 full slots at the top of the image, versus only 8 on Sample 6.

Sample 2 – 1.95 s
Most of the features on this sample remained in good order with only minor deformation. Take note of the thin fins in the left and center of the photo.

Sample 1 – 1.70 s
This sample, which was our lowest exposure, showed some moderate deformation on the thin fins.
As you’re probably thinking, Samples 1 and 2 are looking good. To help in making the final decision I broke out the calipers and measured the 5mm cube.
I noted that Sample 1 read 4.97mm while Sample 2 read 5.00mm. So, Sample 2 at 1.95 seconds was the winner.

Validation Using Cones of Calibration
To further validate my choice of 1.95 seconds for the normal exposure time, I went ahead and printed the Cones of Calibration from TableFlip Foundry.
You can read about it and how it works under the Research section at the bottom of this article.
I printed two of them to ensure the results of one weren’t a fluke.

Success Side
All the cones connected nicely on this side.
Failure Side
The last two cones formed on the failure side unfortunately which would indicate overexposure still even at 1.95 seconds.


Cones of Calibration Samples
While the Cones are great indicators of exposure times, the fit and function of the rest of the model are also key.
As such, I continued to test and the sword passed the fitment tests.

With the fitment test passed, I went ahead and printed the final validation – Puck the Adventurer.
This is a 3D model freely provided by TableFlip Foundry as your final check for exposure times.
This is a miniature print that if printed well shows that your settings are good.
Things you’re looking for here are fine details, completion, and good detachment from the provided supports.

Curing the Samples
They printed out beautifully and I used this opportunity to finally use the curing function of the Anycubic Wash & Cure 3. It was easy to use and did its job well.


Puck came out really nice and in one piece and with lots of detail. I was happy with the results and this cemented my exposure time of 1.95 seconds from the RERF test.
Printing the Fun Stuff
Now that the printer is dialed in, what do we print first?
Well, as I mentioned at the beginning I want to print cool or functional things.
When I received this printer, one of the first things I noticed was that it had an air vent port on the back of the unit.
Anycubic mentions it on the M7 Max product page, see below.
I couldn’t find a port adapter that fits this on their website so maybe it’s still under development.


Air Vent Adapter
I thought this would be the perfect functional print to start with.
You can see that this port was meant for an adapter with some locking tabs.
Back when I started my career in engineering a long time ago, I had to learn CAD (computer-aided design) to draft things.
As I progressed in my career, there was less and less need for me to use these skills.
However, I loved it so much that I just continued learning new CAD systems on my own through YouTube.
I’m now able to use these skills for fun things like 3D printing.
As such I set out to design an adapter to fit this cool little air vent port.

Slicing the 3D Model
After drawing it in CAD and exporting it as a 3MF file, I imported it into Photo Workshop to add supports and slice.
Above you can see that I orientated the model in a non-traditional manner.
From what I’ve read, most people like to orient their models to reduce the footprint and, therefore, minimize the number of supports (as seen in blue) and the damage they can cause.
Derek from Lychee made a cool video in which he speaks about engineering parts like this one.
Where orientating it in this manner can be beneficial to reduce damage from supports.
For example, surface damage is left behind after pulling the supports off.
It helps preserve the quality of features like the tabs for the locking mechanism, too.

The part printed perfectly. The missing support near the build plate is actually in the file sent to the printer and was not misprinted.
I had to double-check that after seeing this.
It printed in a little less than 2 hours at normal speed.

Post-Processing the Adapter
After washing it first in water then with alcohol and removing the supports, I cured it using the Anycubic Wash & Cure 3.


The Final Part
The final product was beautiful in matte white. The support damage was all contained on the inside of the print which will never be seen so I left it as-is.
At first, the tabs were too thick to fit the locking grooves in the air vent port, so I filled them down to about 1.6 mm and that worked well.
I edited the file to compensate for this for future prints.


Using the Adapter
The adapter is designed to use the readily available 3” flexible aluminum foil duct and standard clamps (although I only had a 4” on hand and made it work).
The adapter worked very well and I was satisfied with it.
We’d love to share this file with you!

Print Your Own Air Vent Adapter
We’d love to share this file with you and you can download it here.

Next, I wanted to print something cool that had detail and also used more of the printer’s size capacity. My sister likes Ravens so I found this 3D model on Cults 3D for a few bucks.
It was challenging to add supports and to ensure I had no suction cups after hollowing but it was successful.
This was a 6 hour print and stands about 7 inches tall.

This was almost as big as my curing station could handle but it did. I made a lot of holes on the bottom of the base to allow for drainage of resin and water / IPA during the cleaning process and it worked.


I really loved how it turned out with so much detail, no layer lines that I could see, and printed so quickly considering its size.

Anycubic App
Connecting the printer to the Anycubic cloud allowed me to see the printing progress even when I was out of the house which was so cool.

It was also nice to get a push notification when the print finished.

If there was one thing I could change to improve the machine is to switch the location of the “Z-axis zero point” button with the “Leveling” one.
This is because when you want to jog the build plate up a little to remove it without dipping your prints in the resin when you go to click on “10mm” or “50mm” with gloves on.
Sometimes you touch the “Z-axis zero point” button by mistake and the build plate starts to lower with your prints on it which could damage your machine.
Or change the screen layout so that the distance buttons are away from the two aforementioned buttons.
Conclusions
Overall, I was impressed by this machine. From the build quality to the printed items – it’s solid.
I’m so motivated to continue my learning journey in resin 3D printing now.
The build volume on this printer is so large that it is not a limiting factor for anything I want to print.
From the experience of a total newbie to 3D printing, I would recommend this 3D printer to anyone who would love printing large models, like me.
However, for those wanting to print miniatures for tabletop gaming or collectibles, Anycubic offers many other printers that are more budget-friendly.
Has my experience inspired you to start 3D printing in resin?
Let me know below!

Research

R_E_R_F Test from Anycubic. This is the test print that’s included with your printer and will help you dial-in the best exposure time for your printer and resin combo. You can find the instructions on their site here.

Photo credit: TableFlip Foundry
The Cones of Calibration V3 by TableFlip Foundry is another great exposure test to run. It incorporates a functional fit test with four removal components to test fitment determined by proper exposure time settings.
They have a detailed explanation of how their test works and a free download link.
Once your test print is successful, you can follow it up by printing their freely available mascot Puck model which uses the four test pieces you’ve already printed.

Video screen capture credit: VogMan
Geoff the VogMan – “Dial in your 3D printer resin…”. Simple well narrated instructions, easy to follow. He states that he’d rather over-expose than under-expose to avoid print failures on the FEP like the ones shown above.
It’s best to start test prints at the manufacturer-recommended normal exposure times if available or a conservative 3s and go up from there.
He also gives us a nice tip. If your print falls off well-placed supports, try lowering the Lift Speed to reduce the force at which the print pops off the FEP.
PIN FOR LATER:


Frank has been interested in all things mechanical ever since he was able to take apart his toys to see how they worked. From that point, he pursued a career in the mechanical engineering field. Fast-forward to today, and he’s now worked in the manufacturing engineering field for the last 24 years. His hobbies include modern Woodworking using a CNC router, PC building and gaming, home renovation, and recently 3D printing. His engineering background and varied interests allow him to provide insightful and detailed reviews of whatever he’s researching. To this day, he still takes his toys apart, but now knows how to put them back together.