Ideas for a Girl’s Tween Room Makeover: Declutter, Re-Organize and Reuse with The Help of HP! #SpringCleaning
A Tween Room Makeover.
Spring has sprung but, while we still have our chilly days. Though I know we are certain to enjoy warmer weather really soon. At least one can hope. It was definitely a very long winter and that means that it was a long time to collect and clutter a lot of things indoors.
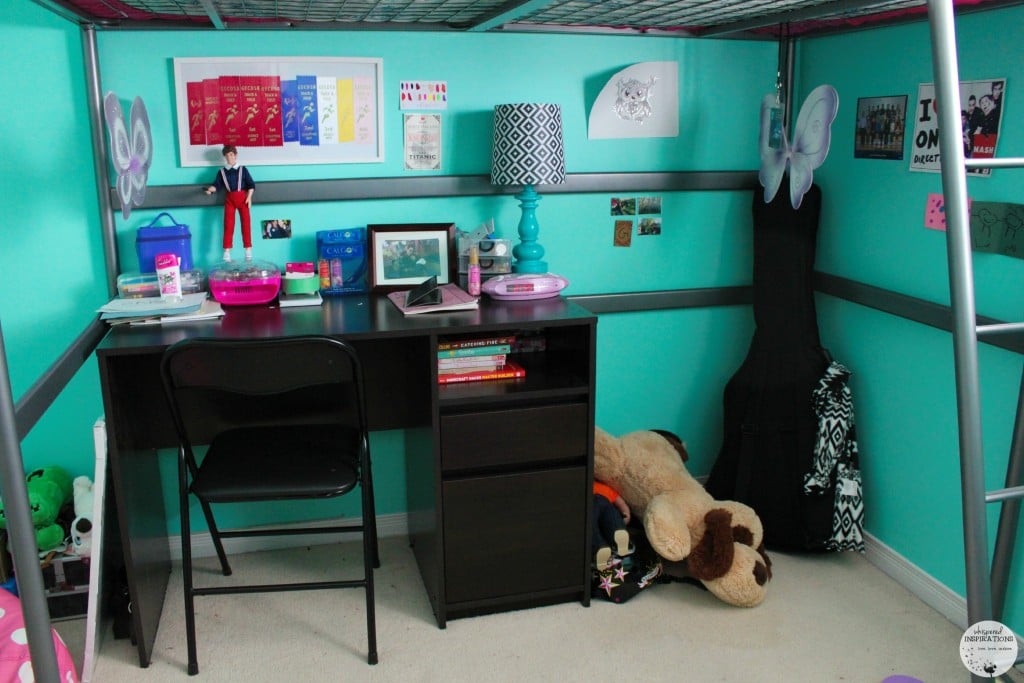
You can see Gabby’s room above, it definitely needed some attention. It wasn’t all that bad but, it had begun to get really cluttered. I also cannot remember the last time she dusted anything in there and you can forget about vacuuming. But she had given in and agreed to clean and organize it when I mentioned a room makeover.
We’ve taken advantage of the weekends where we have had nice weather and started our Spring cleaning. I had the chance to take a look around the house and attack the areas that needed attention.
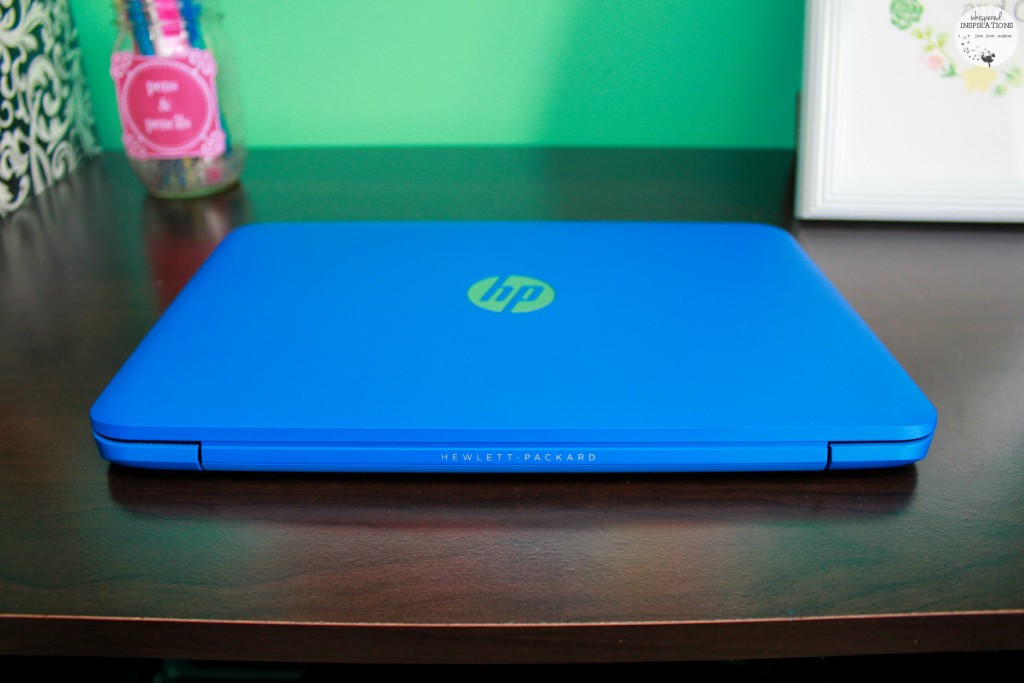
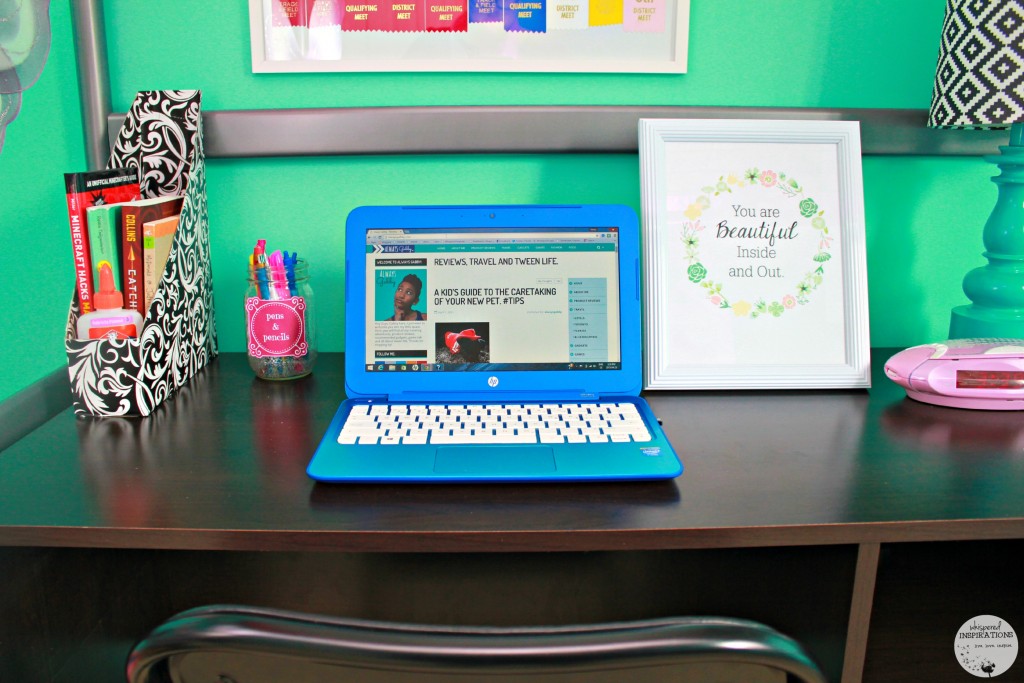
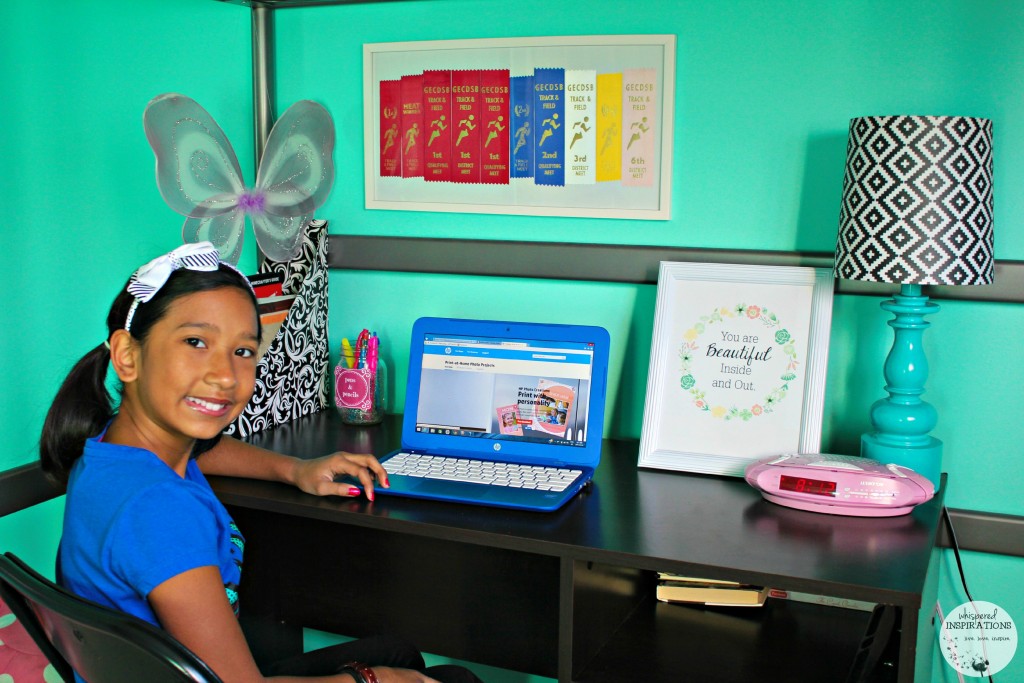
Thanks to HP and with the help of our new HP Stream 11 laptops, we were given the opportunity to think about how we can not only reorganize but, reuse items we already have hanging around the house. The one thing I did tell her is that we will order cowhide rugs online to complete her country/horse themed room.
Spring into Spring with HP.
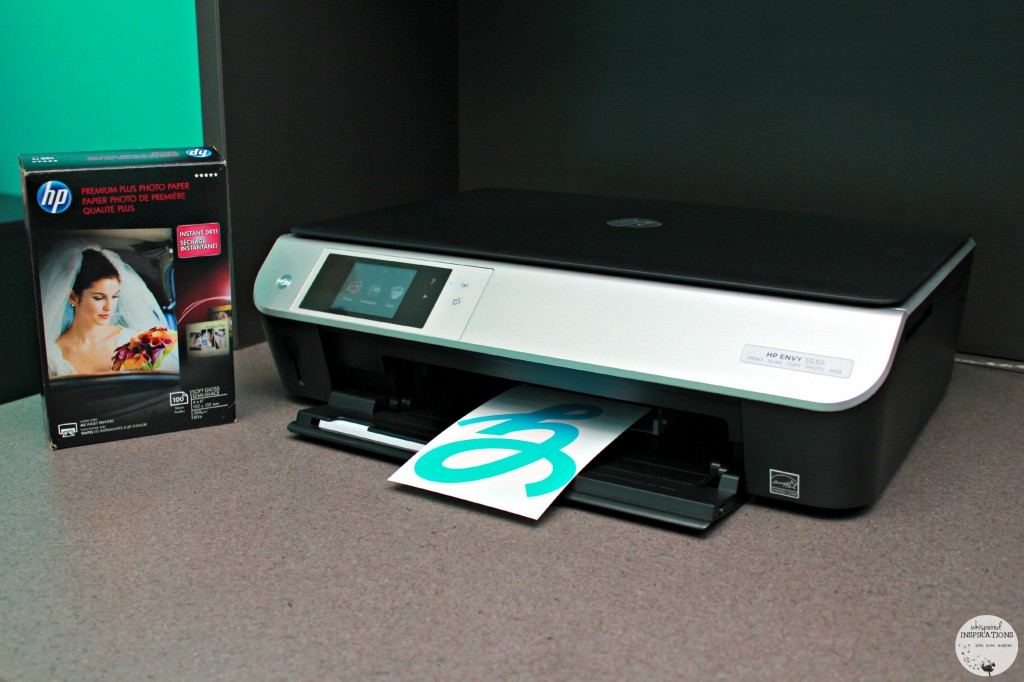
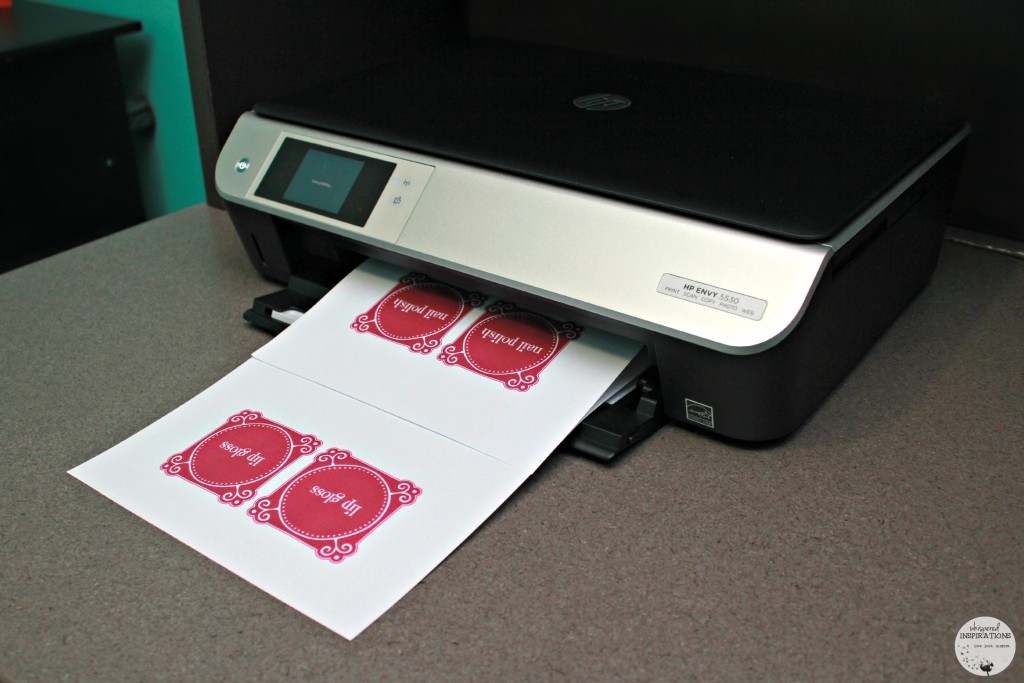
I don’t know if I’ve told you how much I love my HP Envy 5530 e-All-in-One printer. It has helped me all year-long by printing out birthday invitations, thank-you cards and filling many a picture frame.
Not to mention, it has helped me get more organized with my business and that is always a plus. Those are just a few ways I’ve used my printer and one of many reasons why I cannot live without it.
My Spring Challenge was to pair my nifty HP printer with my new HP Stream 11 laptop. Together, they make a great team. I took a look at my house and decided it was time we made over Gabby’s room. You’ll be surprised at the things we used to make her room a little more mature and stylish.
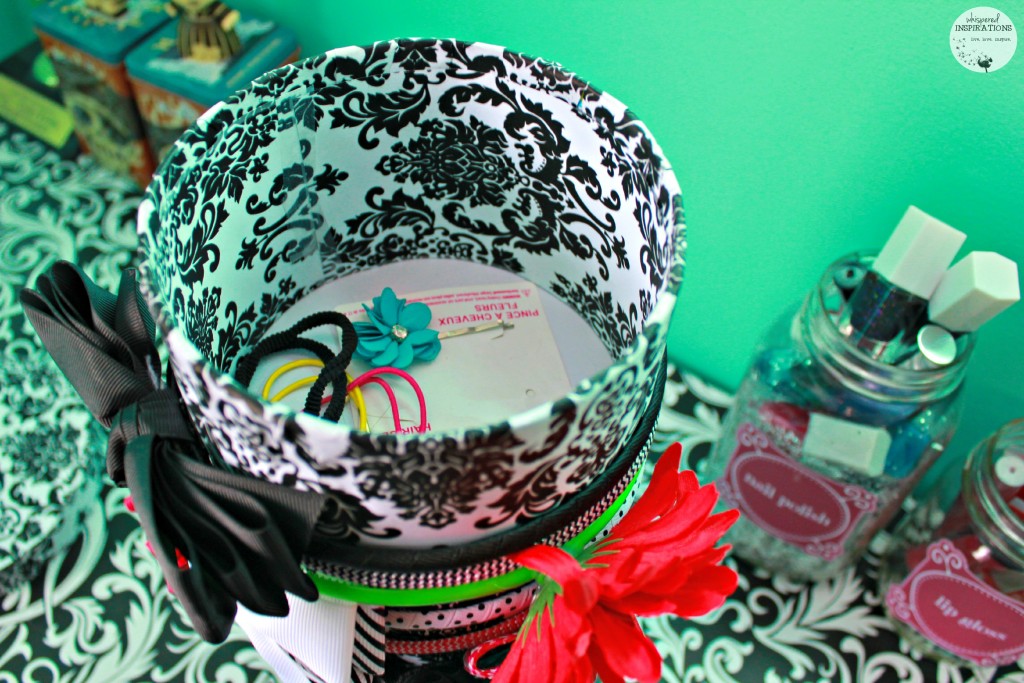
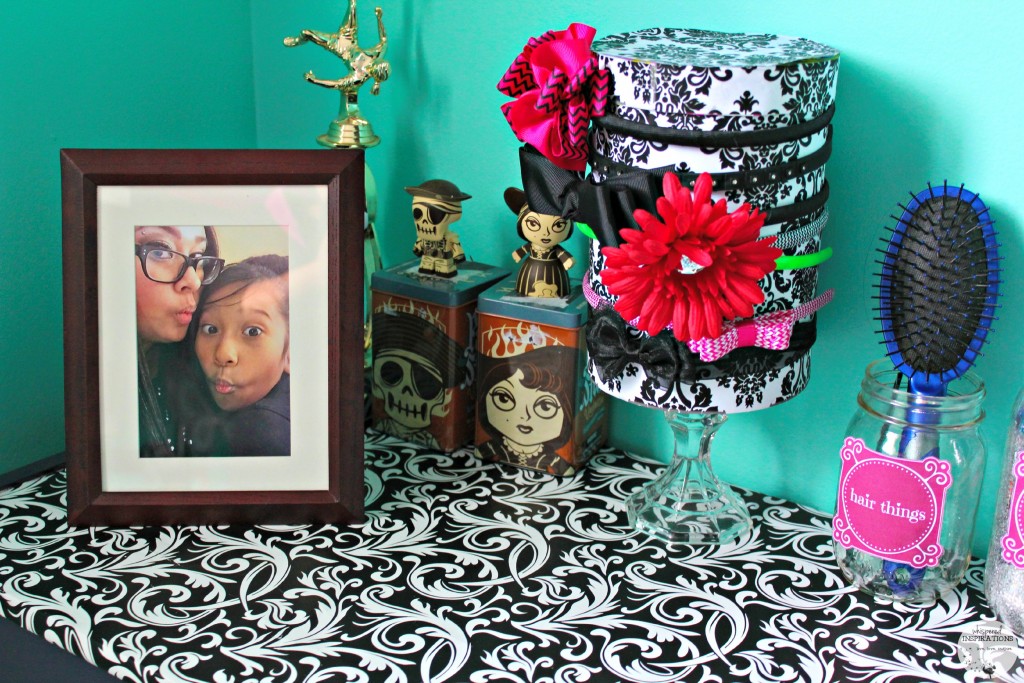
A Headband Holder.
One of the problems that we often run into on almost a daily basis is losing or misplacing headbands. When Gabby picks out her outfit, I ask her to wear a certain headband and she just stares blankly because she can’t seem to find it.
This is almost a daily occurrence and it is partially my fault for not having something functional to organize them. They are a bit hard to store and can get bulky if not stored properly.
Search, Choose and Print.
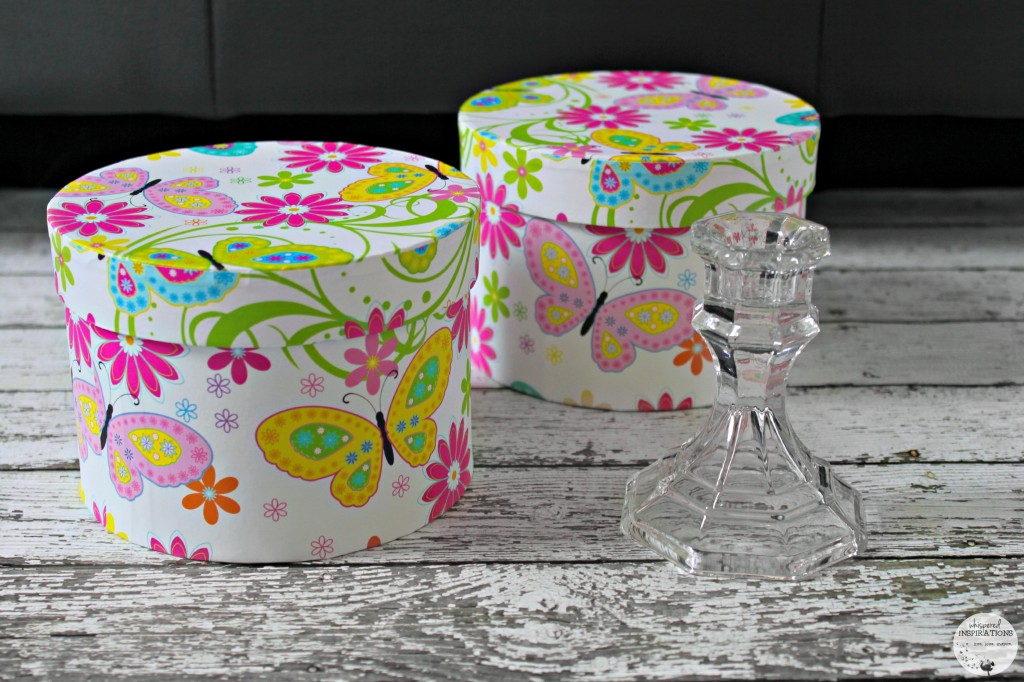
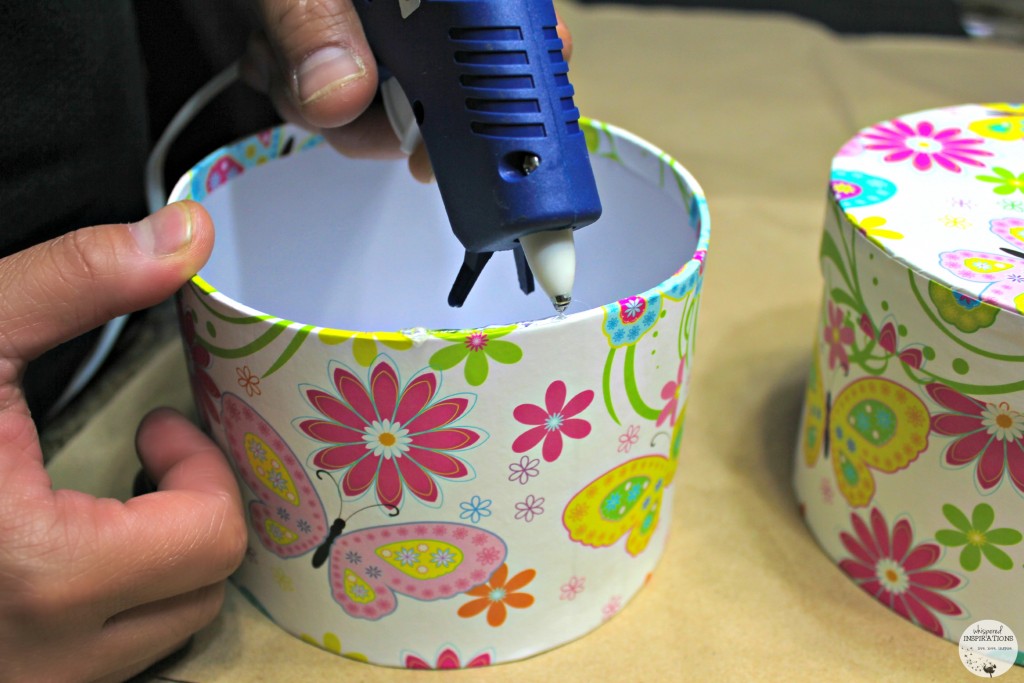
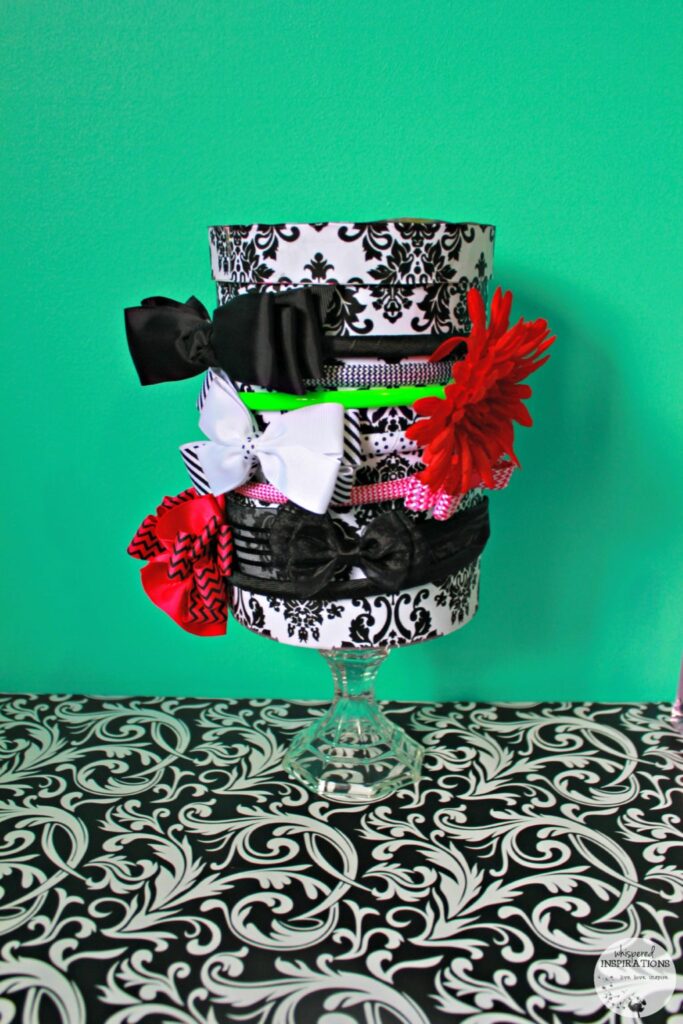
Our solution was to make Gabby a headband holder that wasn’t only stylish but, functional. I had two gift boxes left over from a Birthday party and that I never used. I had a single candle holder missing its partner, it had long since been broken. Hubs helped me build this little holder that not only displayed the bands but, held them securely.
Make It!
You will need: 2 gift boxes, candle holder, scissors, hot glue gun, HP paper and tape.
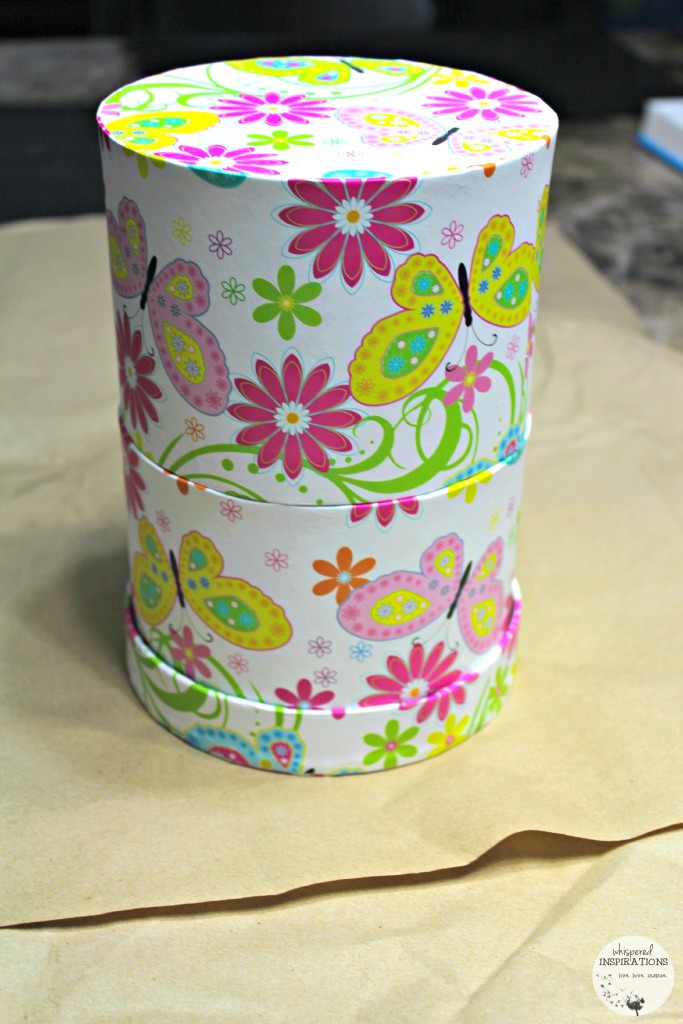
- Remove the lid and flip the gift box upside down then hot glue the top edge of the other gift box.
- Hot glue them together to make one solid piece. The end result is one large cylinder with the top half able to be opened and closed with a lid.
- Once dry, flip the cylinder upside down and hot glue the candle holder onto the base of the cylinder.
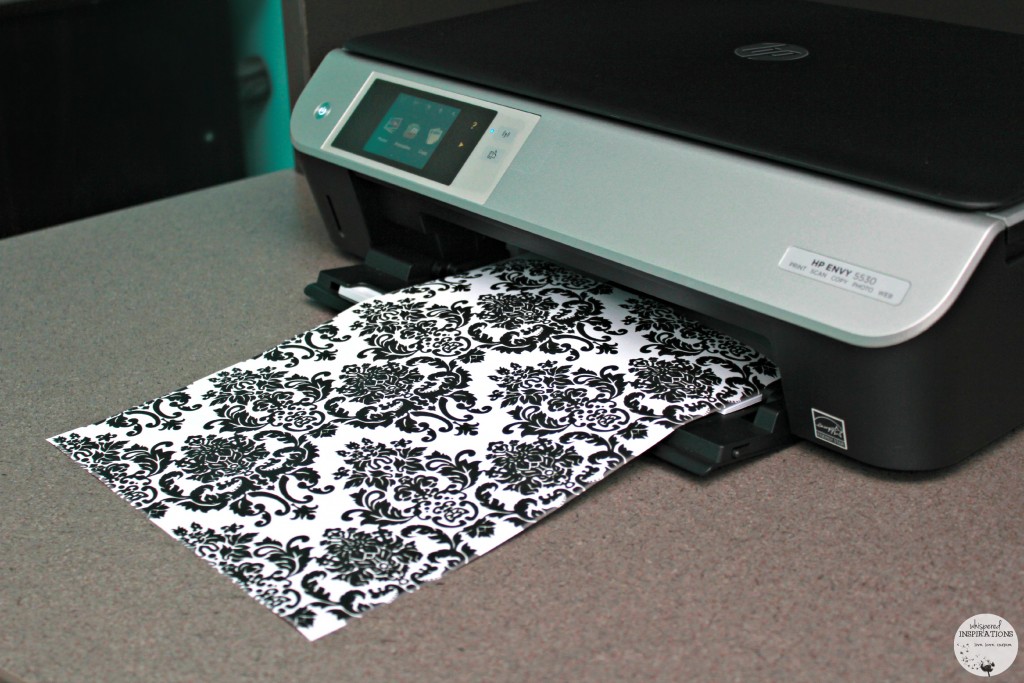
- I used my HP Stream 11 to look up a nice baroque pattern and printed it off with my HP 5530 printer.
- After you printed off your design, use the hot glue gun to attach the paper onto the cylinder. Measure it to see how much you will need. I used two printed sheets. Leave about 1/2 inch excess to wrap over the top edge.
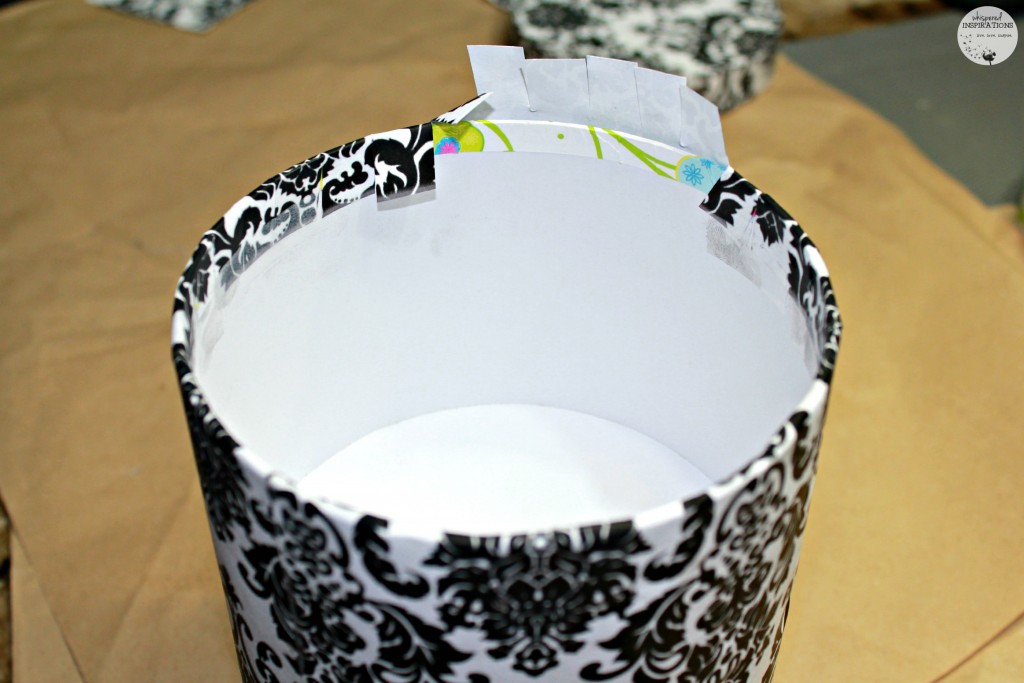
- Use scissors to cut the excess to make it easier to roll over and tape. Measure the inside of your box and cut the amount you need to cover the inside, glue and then secure two ends with tape.
- For lid: Trace the lid and cut the circle for the top of your lid. Measure the circumference of the circle and cut a strip long enough to secure around the lid. Glue both onto lid and it should now match the whole cylinder.
- Add headband, open the lid and add all of your hair ties, pins and elastics. Overall, just enjoy the organization!

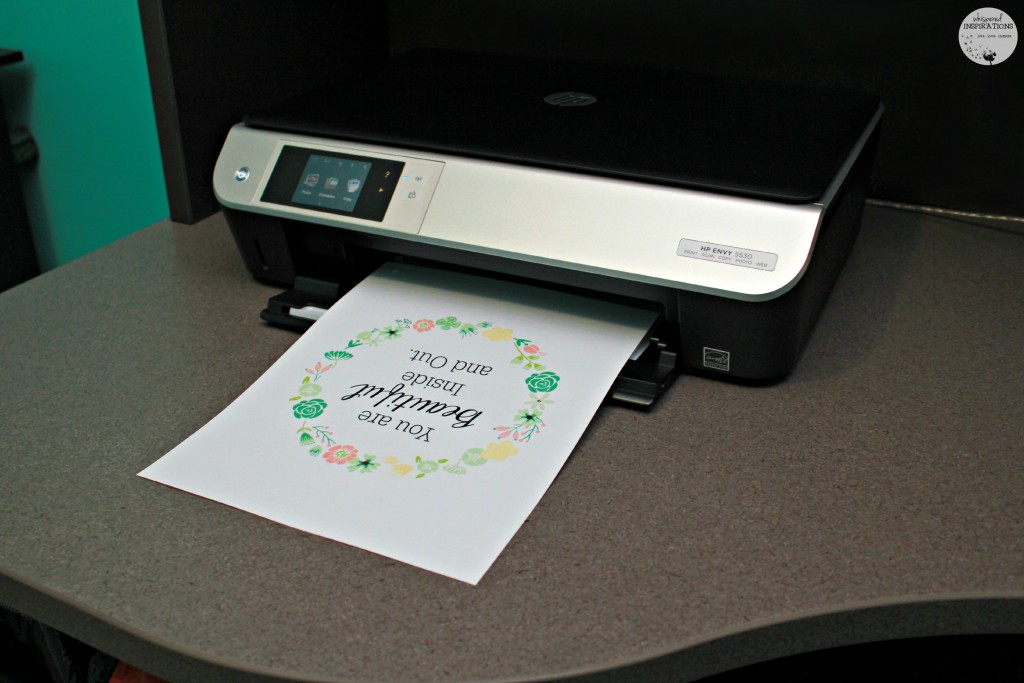
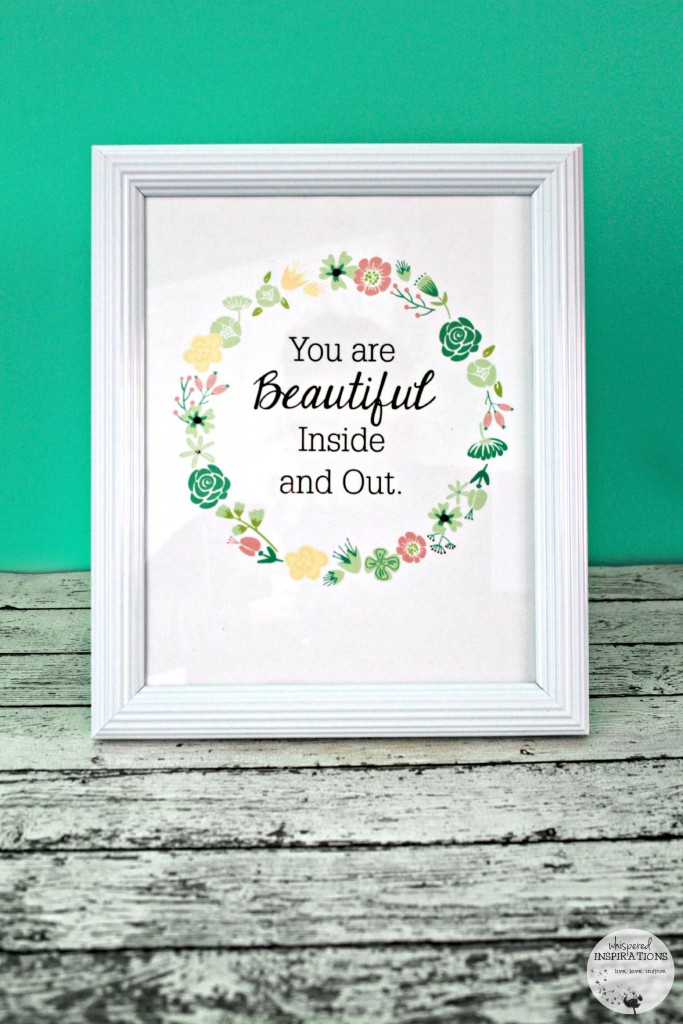
You Are Beautiful.
One of the things that I always tell my girls is that they are beautiful. Not only on the outside but, from within. I used my HP Stream 11 to look up some free printables online. I found the perfect one and as much as I would love to take credit for this gorgeous one, it’s not my work! You can easily look up “free printables” and find the perfect one for you.
This was simple enough. I had this gorgeous white frame empty for a while. I’m more of a black frame kind of gal. This one was just aching to come to life. Not to mention, I think white is very dainty and shabby chic and works well for a girl’s room. I used the HP Bright White inkjet paper and in seconds–the result was this!
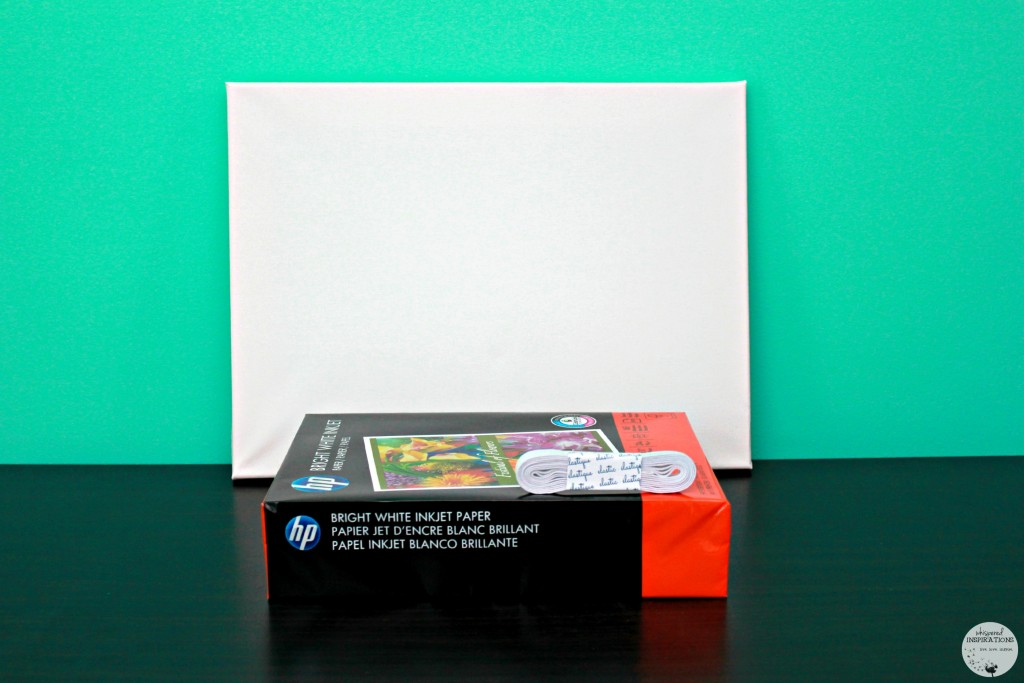

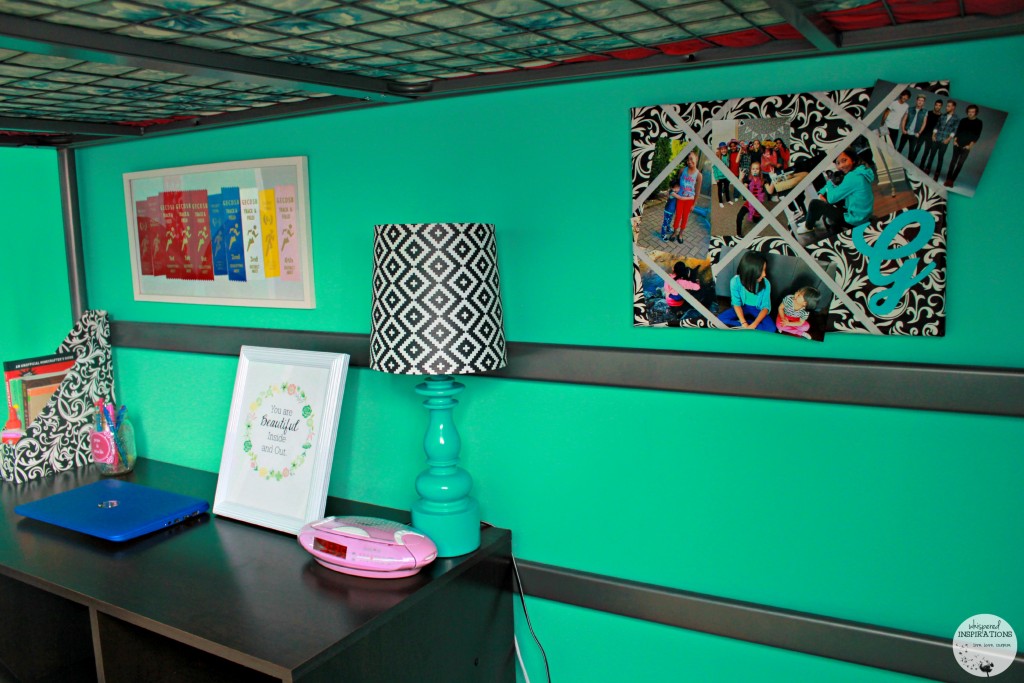
A Picture Board.
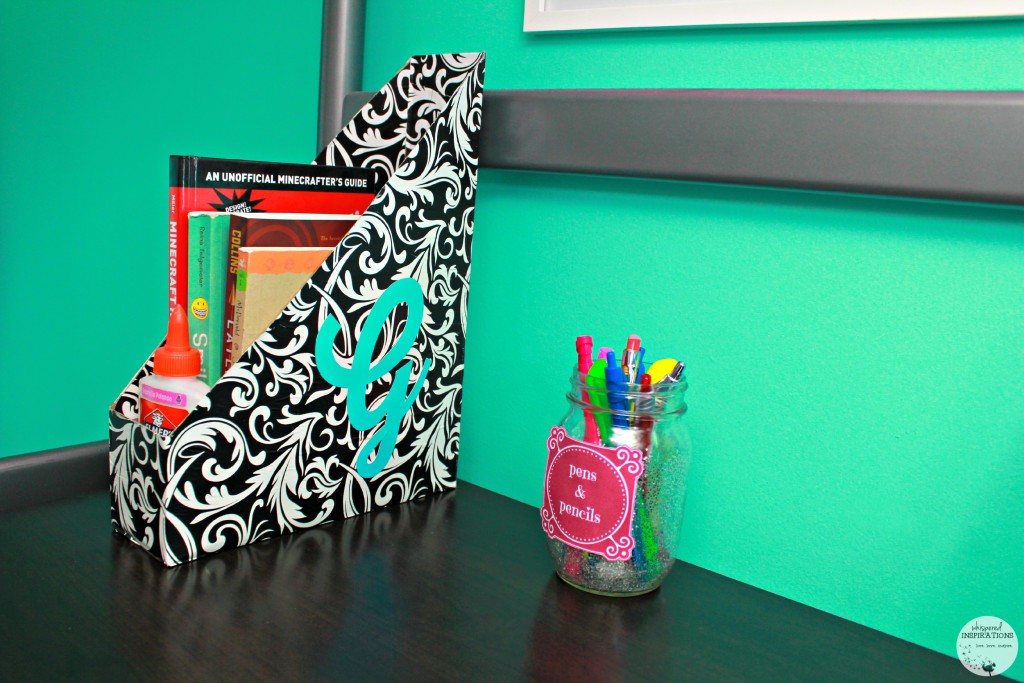
I had some extra elastic band in my sewing kit and I always have blank canvases on hand for crafts. You can use any size but, we chose a canvas that was mid-sized. Gabby hopped onto her new HP Stream 11 and looked through my One Drive storage to find pictures she wanted to print off on our printer. I designed a “G” and printed off two. One for this craft and another for later.
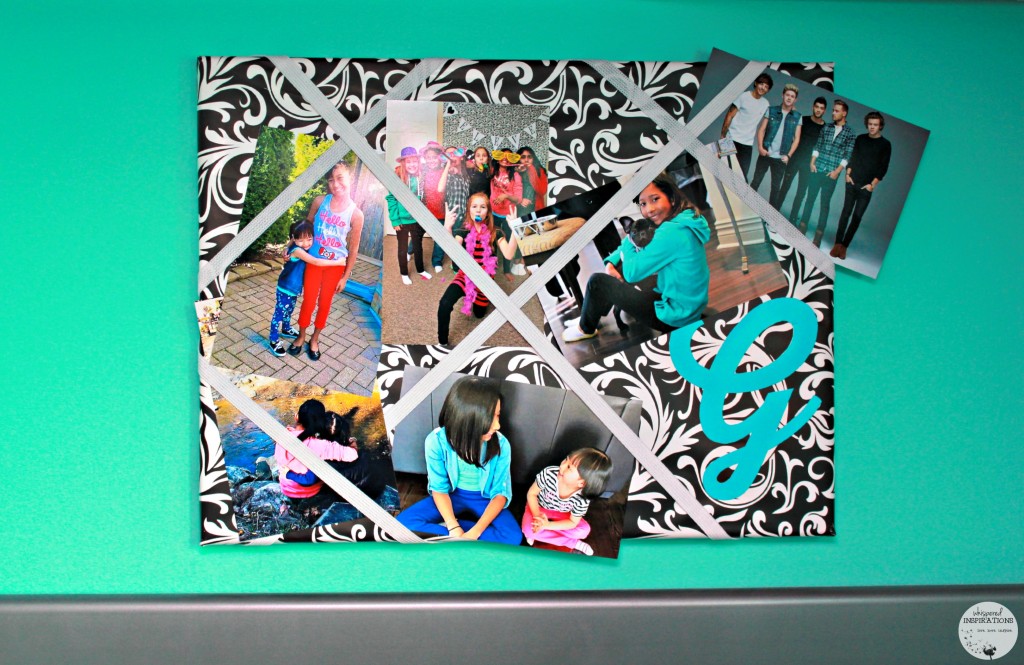
Make It!
I used photo paper to print off the pictures and the “G’s” and cut out the G with scissors and an X-acto knife. Choose a design for your board. You can print it off or use any paper of your choice to cover the entire canvas. Take the “G” or letter of choice and paste it to the bottom right corner of the canvas.
Take your elastic band and use it as a marker from edge to edge of the canvas. Pull it tought and pull it over to the back of the canvas border. Cut the length, do this 4 times. With a stapler, criss-cross the elastic and staple to the back wooden border of the canvas.
Refresh Your Frames.
Another super easy way to liven up any space is to take old frames hanging around and replace it with a new picture. I know we often forget to update them. Gabby chose a selfie of her and I to add to the frame. She chose a picture when we went up to Waterloo for We Day. It was a fun time and it makes me smile that she chose it to display. In seconds from choosing from the One Drive, it was printed off and then into the frame.
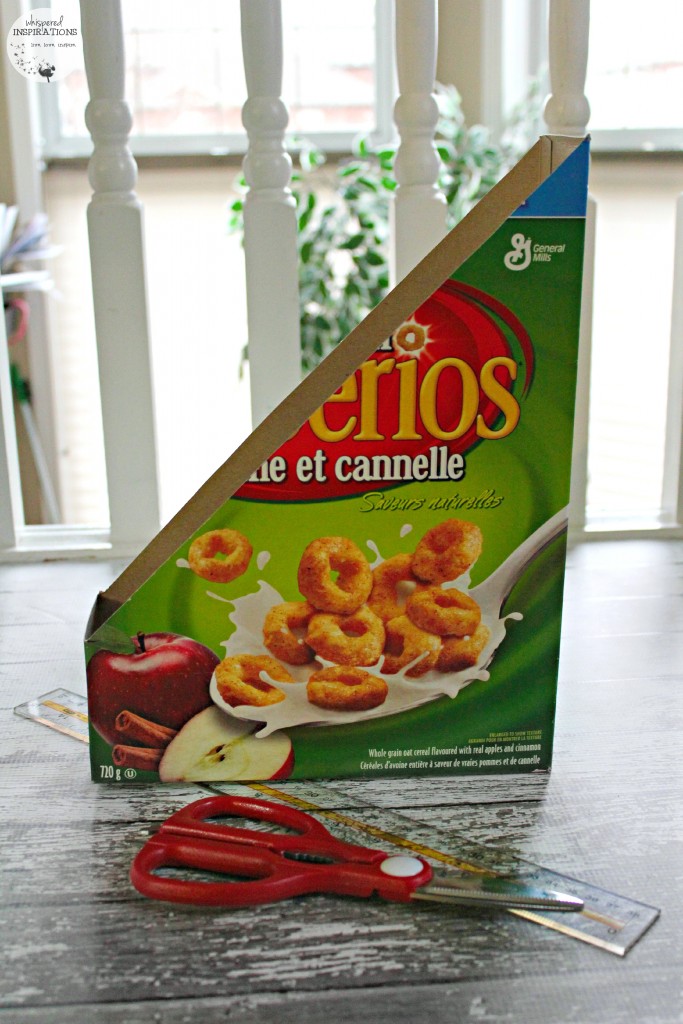
Display Your Favorite Books.
The girls have a book shelf in the basement and in their play area but, Gabby often is reading multiple books at a time. They tend to take up a lot of real estate on her desk or dresser. This was a perfect solution to put away those few books and to have them ready when she wanted to read.
- Using a ruler, measure 2 inches up from the base of the box.
- Make a mark with a pencil.
- From that mark, draw a line using a ruler and run it to the top of the box. Do this for both sides.
- Cut along the lines and remove excess.
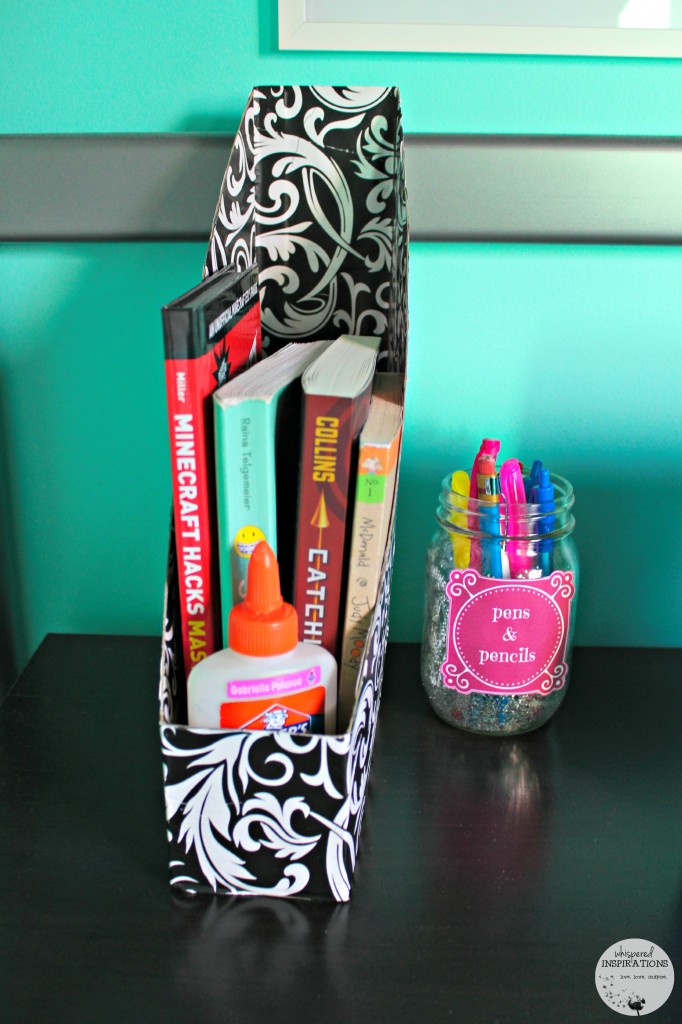
- Pic and choose your design. You can use glossy brochure paper or any paper you like.
- Depending on the size of your cereal box, determine how much printed paper you will use.
- Measure and cut the paper using the same technique.
- Use white glue and brush onto the cereal box so that it is even.
- Attach paper and wrap it around and inside.
- Let it dry and enjoy!

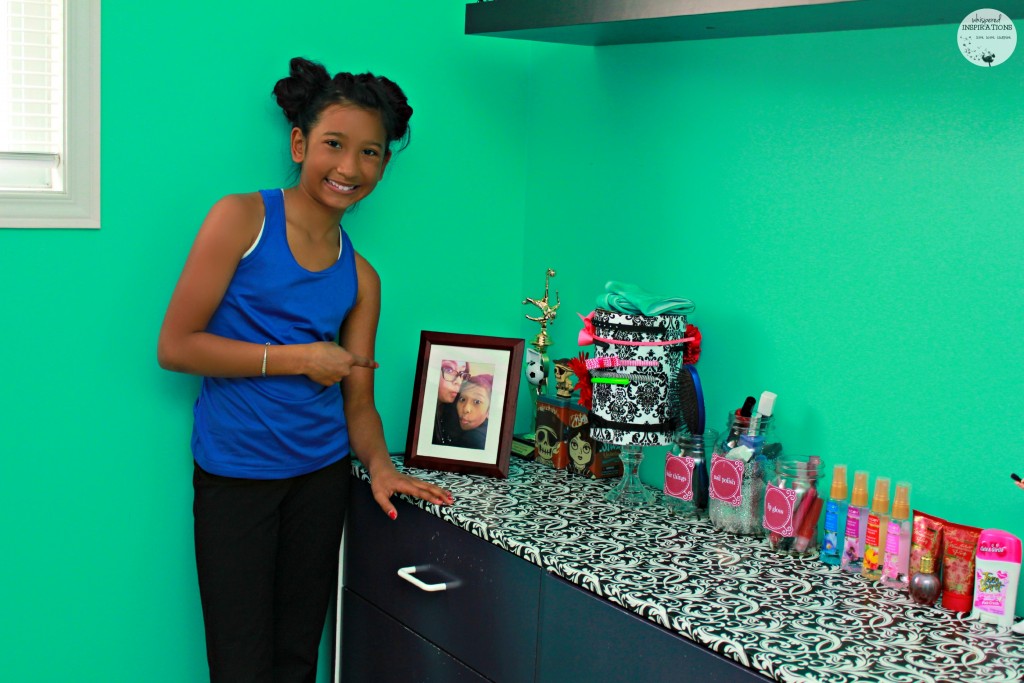
Pretty Storage.
I am a mason jar fanatic, even before I got into jarring, I used them as drinking glasses! As you can imagine, having a tween, all of these things tend to be all over the place. Lip gloss there, nail polishes in drawers and hair brush nowhere to be found. I wanted everything she needed to be in one central place.
I used my HP Stream 11 to hop on and design these labels. Once I finished, I printed them off on my HP Printer and then cut them out. I used 3 small mason jars for lip gloss, hair things and one for her desk for her pens. I used a large mason jar, brushed glue inside and added glitter. I tipped the jar onto a paper plate to catch the excess and allowed it to dry.
All I did was hot glue the labels onto the front of the mason jars. To make it more uniform, I covered the writing on the mason jars and used it as a marker so I knew where to add the label. End result? Fabulous storage jars! You can print off your labels easily.
Download: Hair Things Labels, Lip Gloss Labels, Pens and Pencils Labels and Nail Polish Labels.
Tween-Approved.
Gabby’s room is much more organized and she loves that we incorporated the baroque design into her room. She is stoked to spend more time in there and she absolutely loves her new laptop.
She was blown away with how easy it is to print and loves the fact that at anytime, she can wirelessly print homework or new pictures! You can head over to her blog, Always Gabby, to see her thoughts about her room makeover and new laptop!
Apart from making these easy crafts with things we had at home, we reorganized her closet, gathered and threw out garbage. We recycled tucked away gift bags, stray pieces of paper and unwrapped toy boxes. We also went through a lot of the clutter and donated things that she didn’t use anymore.
We cleaned the windows, vacuumed the carpet and made things spic and span. It’s safe to say that we spring cleaned her room and she is ready to spend down times in her new tween room!
For more inspired craft ideas you can do with your HP devices, visit the HP Create blog. And if ever you needed some alone organizing time, HP Printables can help keep the kids busy with new and updated content like activities and colouring pages.
How do you Spring Clean in your house?
Let me know, til then–cheers m’deres!

Note: HP products mentioned in this post were supplied by HP Canada.

Nancy Polanco is a freelance journalist, lifestyle content creator, and editor of Whispered Inspirations. She is a proud Mom to Gabby and Michaela and partner and best friend to Darasak. Having worked as part of a health care team for almost a decade, Nancy is happy to be back to her passion. She is a contributor to the Huffington Post, TODAY’s Parents, and an Oprah Magazine Brand Ambassador.


You did a great job! I think the magazine holder made from a cereal box is genius!
Thanks Dawn!
What a cute room! I love the colors and how you were able to tie everything in together so nicely by printing your own patterns. I bet you saved tons of money but doing it yourself, too!
I sure did! I also liked that I could design and print exactly what I wanted.
We are always losing out hair ties and headbands here as well. I love your idea for keeping them in one place. Love the picture board as well!
Thank-you, trying to be more organized!
Her rooms looks so beautiful! Great job!
Thank-you, she really loves it!
OMG I CANNOT!!!!!! I love this room! Pinning for ideas for my toddler- I know she will be a tween before i know it and I want some inexpensive ways to be awesome! Great ideas- great post!
My recent post My Mother-in-Law, #52WeeksA4A
Thanks so much! Hope it helps! 🙂
These are some really cute ideas and super easy with the use of your printer. I love what you did with the cereal box. I may have to do something like because I could use some organization around here.
So easy and I love that we reuse it!
I love it! Decluttering and having a trendy style is exactly what we are looking for. This looks great.
Hope this helps!
Now this is an awesome bedroom. I love it… the colors are great and that little bowl? LOVE IT! Thanks for sharing
Thanks!
That's a little eerie, we have a brand new tween and have done some of the exact same things in her room – the photoboard one is a very cool thing we did a couple of years ago. She's been pretty easygoing for the first part of her life, here's to hoping the teen years go as well!
OMG, really?
That make over for her room turned out so cute!! I love how bright and colorful her walls are!
Thanks, she picked it out!
Love the makeover! I made a headband holder with a paper towel roll and a paper towel holder yet I love this idea more – there's storage!
Yes, it needed storage!
The room turned out beautifully! I love the reminder to switch out new pictures in frames. We haven’t spring cleaned yet, but I may have just been inspired 🙂
Yay! Have fun.
What a cute idea. I am in the process of trying to redo my tweens room. I will be using this idea
You will love it!
I love your lamp
Thanks!
Awesome job on the room,loving all the colours
Thanks! She loves it!
What a fabulous job you did! I love all the DIY changes!
Thanks so much!
Great job! And super ideas that are cool to incorporate into the bedroom.
Cheers.
Thank-you!
I love what you done with the cereal box,neat idea
So beautiful i love dressing up a room makes it so cozy!
Thanks!