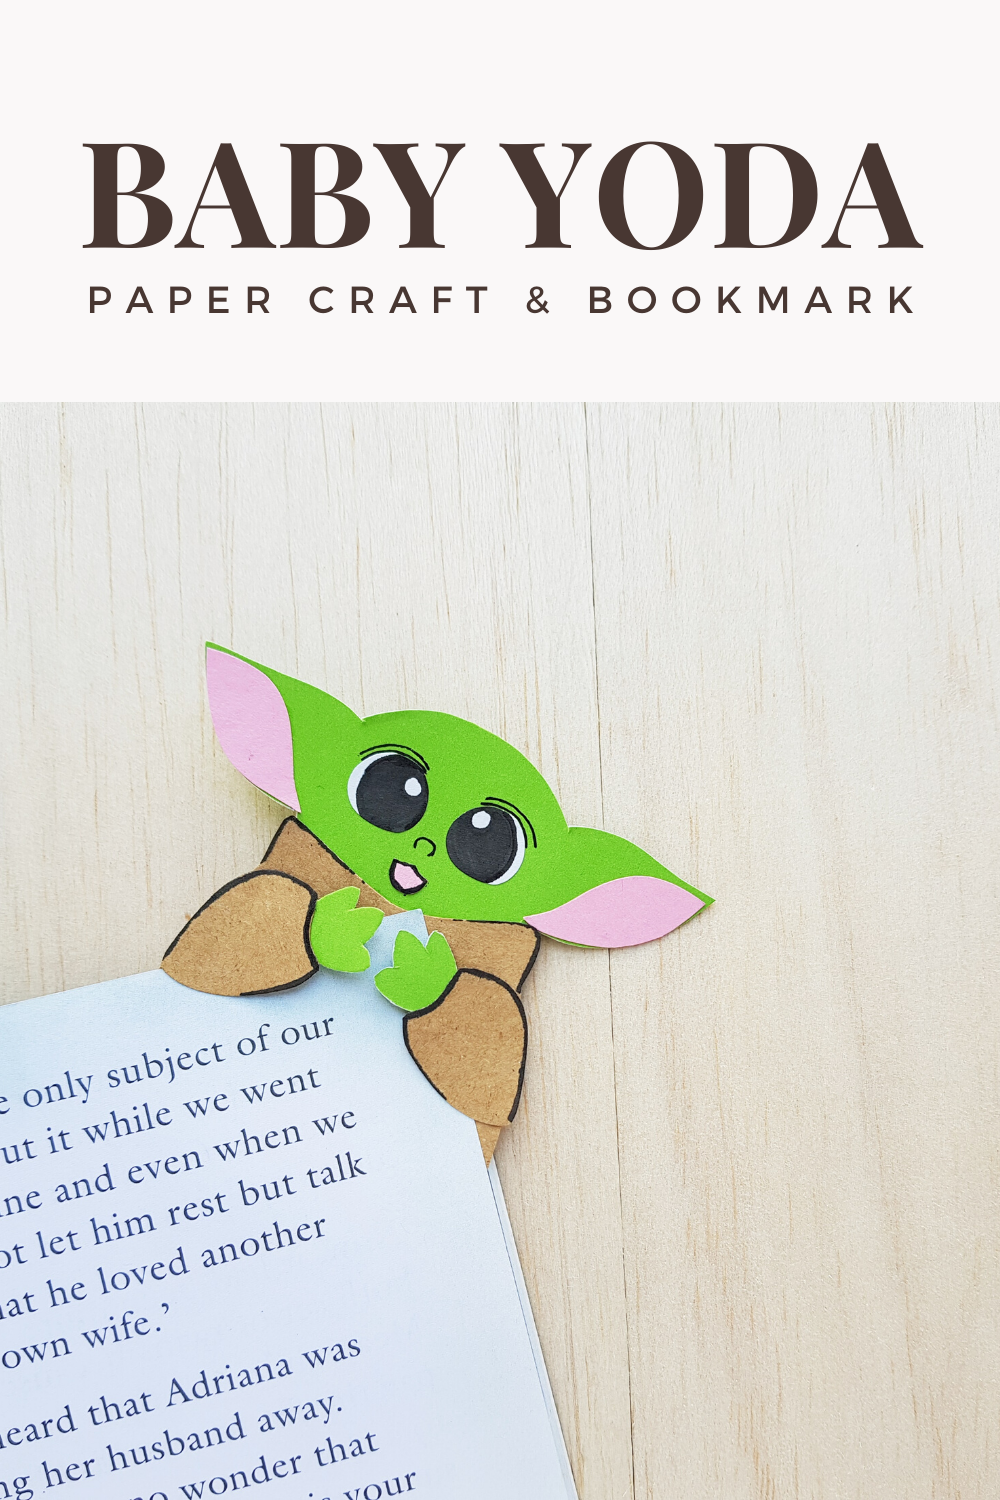
Baby Yoda Paper Craft
Baby Yoda Paper Craft
If you’re like almost everyone on earth, you’ve fallen in love with Baby Yoda aka The Child.
It’s not very hard to not fall in love with him though. For instance, not only is he adorable but, he totally makes the whole Mandalorian series even better than it is.
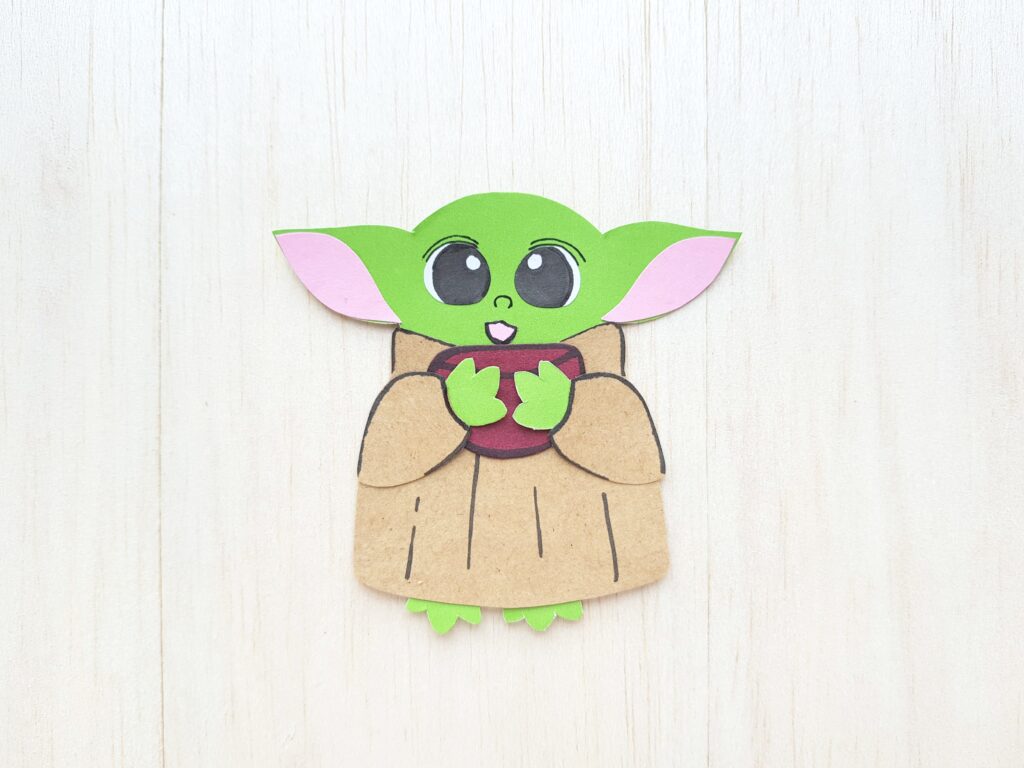
To pay homage to this precious little guy, we’ve made a super easy Baby Yoda paper craft.
Perfect for kids, Star Wars fans, Mandalorian fans, and great for celebrating ‘May the 4th’ too.
Firstly, if you like this craft, you may love our Baby Yoda Bookmark and our DIY Baby Yoda Plushie.
Secondly, read on for the step-by-step guide to make your very own Baby Yoda.
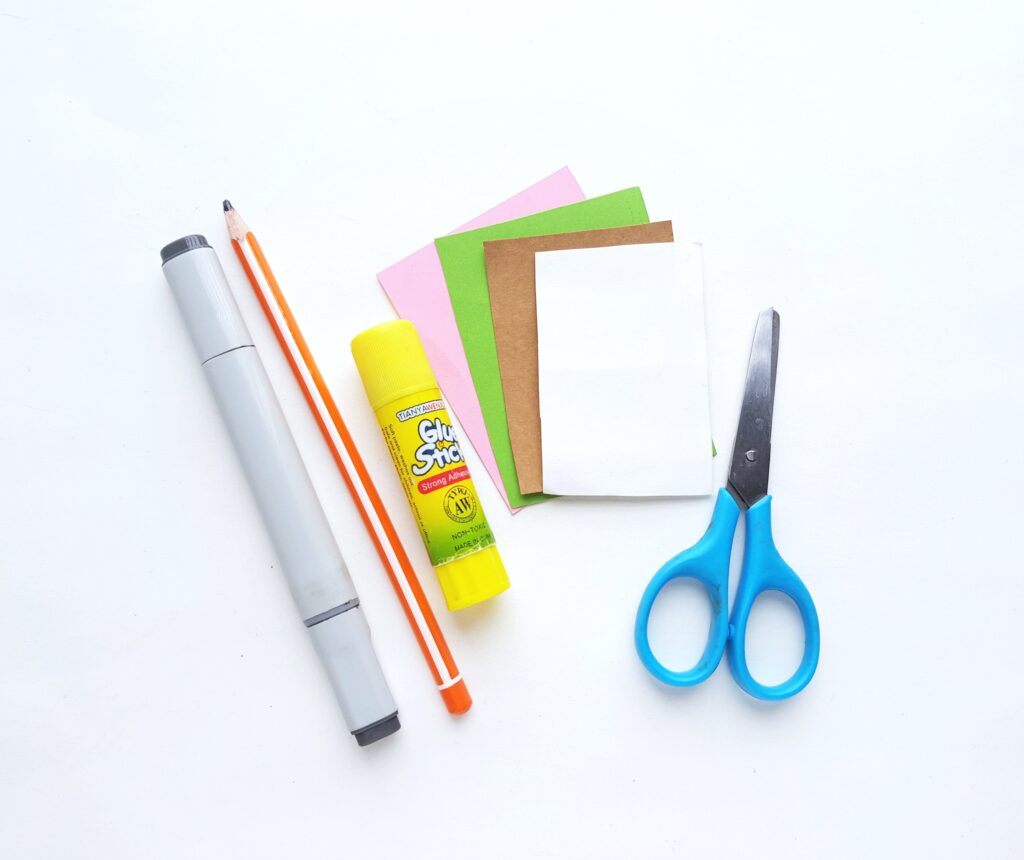
List of Supplies:
Step 1:
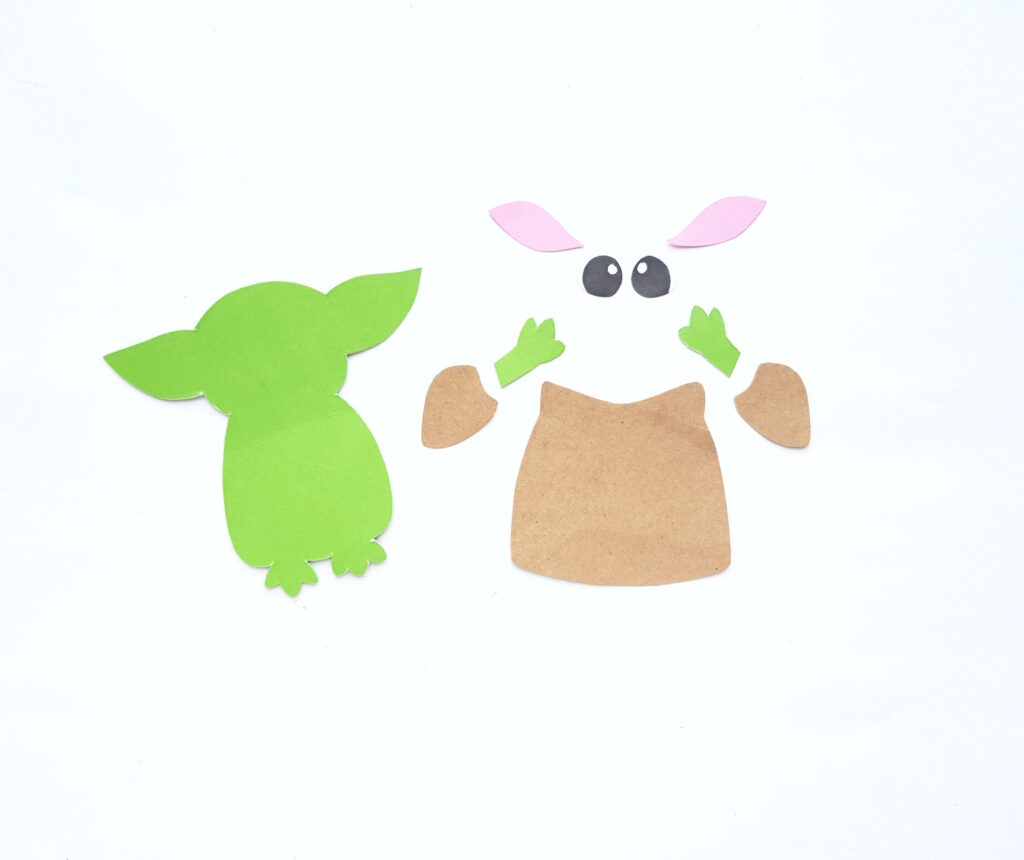
Firstly, select green, brown, white and pink coloured craft papers for the Baby Yoda papercraft.
Secondly, trace the body and the 2 hand patterns (from the TEMPLATE) on green coloured craft paper.
Move on to trace the clothes and the 2 hand parts of the clothes on brown coloured craft paper.
Then trace the inner ear parts and the mouth on pink coloured craft paper and trace the eyes on white paper.

Step 2:
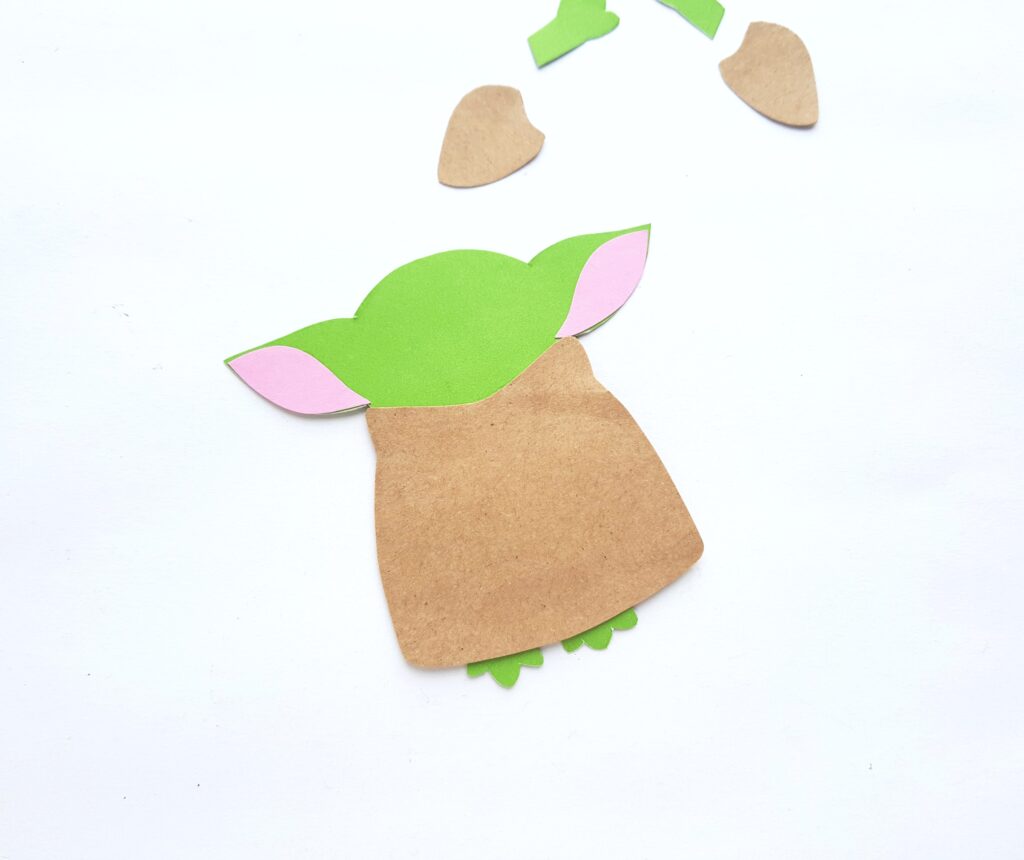
Stick the 2 inner ear parts on the ear parts attached to the main body pattern.
Step 3:
Cover the bottom side of the body with the clothing pattern. After that, attach the clothing pattern to the body pattern. Rememmak ber to keep the head and the feet outside the clothing pattern.
step 4:
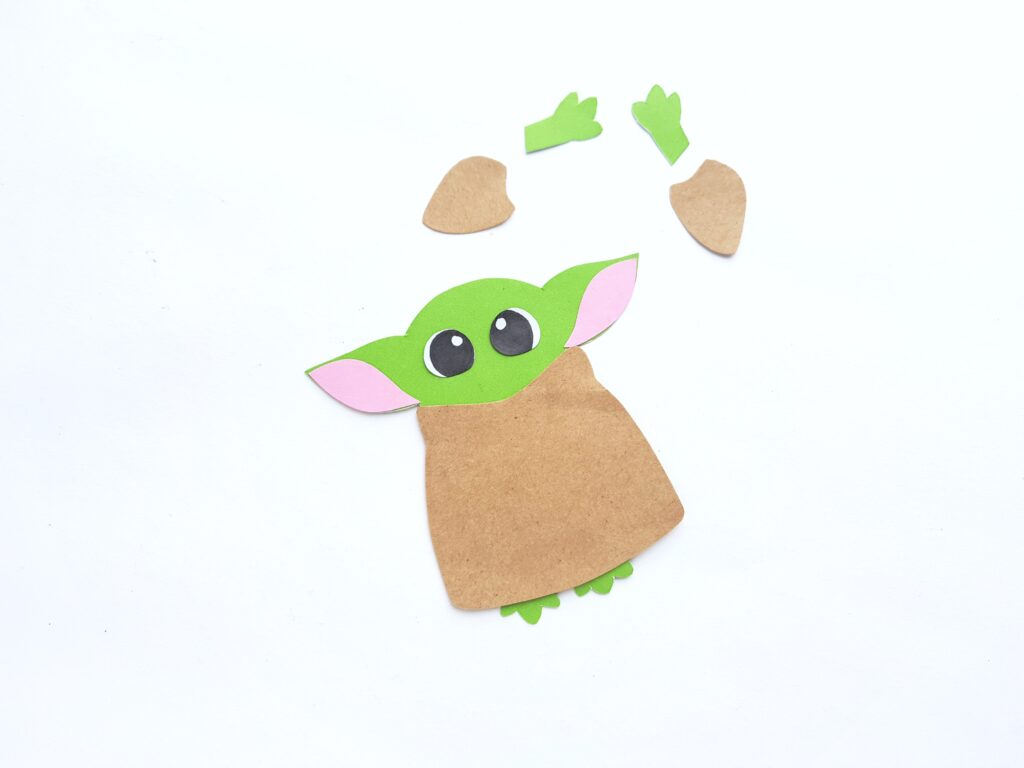
Use a black sharpie to fill the eyes and stick the eyes on the head part.
Step 5:
Grab the hand cutouts and the hand parts of the clothing pattern. Attach the hands of the Baby Yoda with the hand cutouts of the paper clothes pattern.
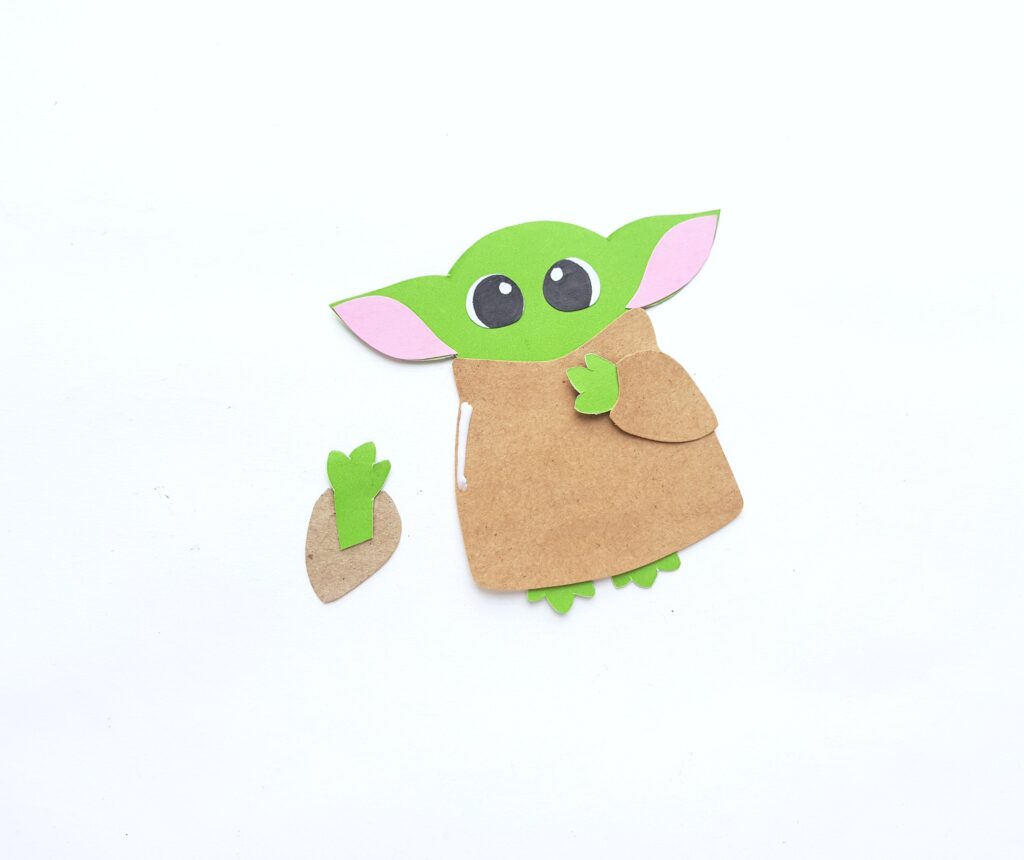
Step 6:
Attach the hands on both sides of the paper Baby Yoda.
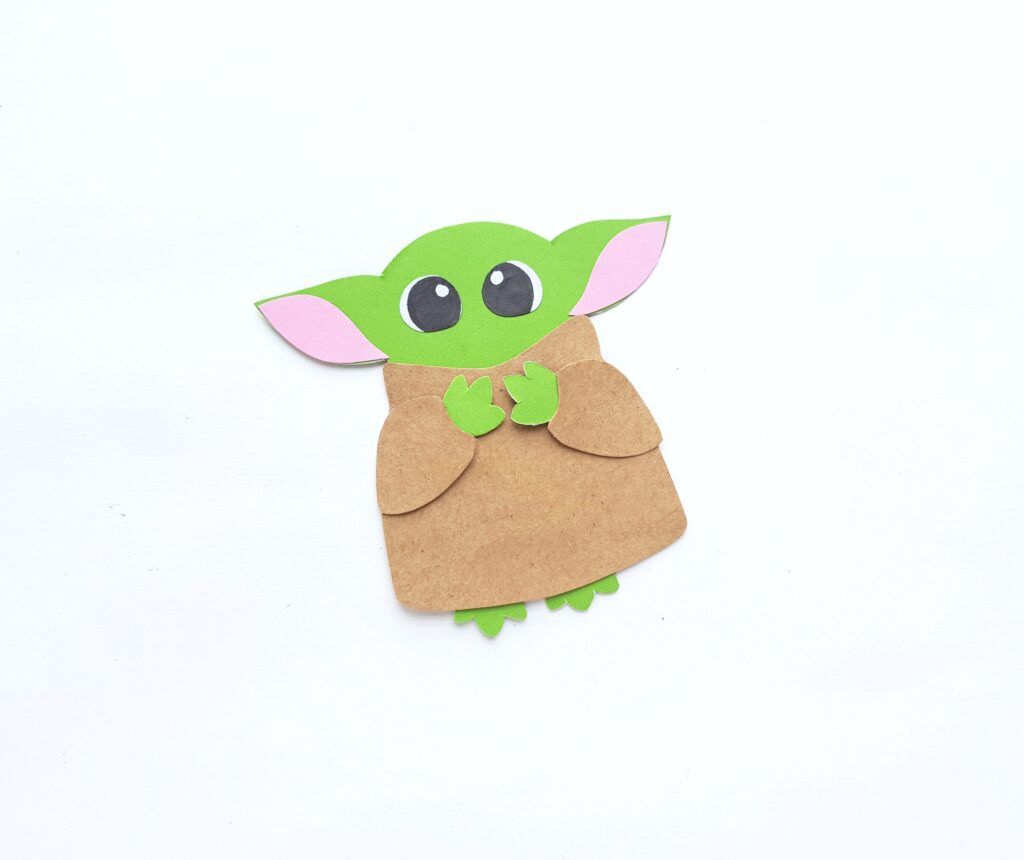
Step 7:
Keep the hands facing upwards.
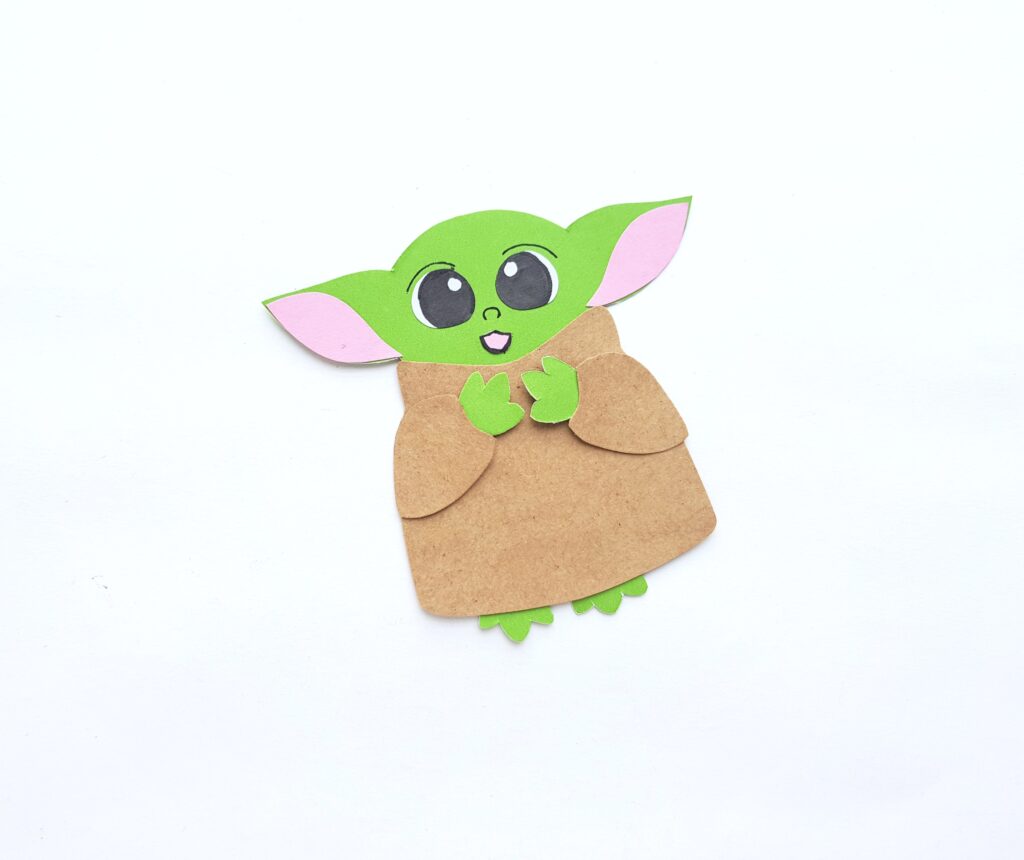
Step 8:
Attach the mouth cut out. Use a black sharpie to trace the nose and to draw borders around the mouth and eyes.
final step:
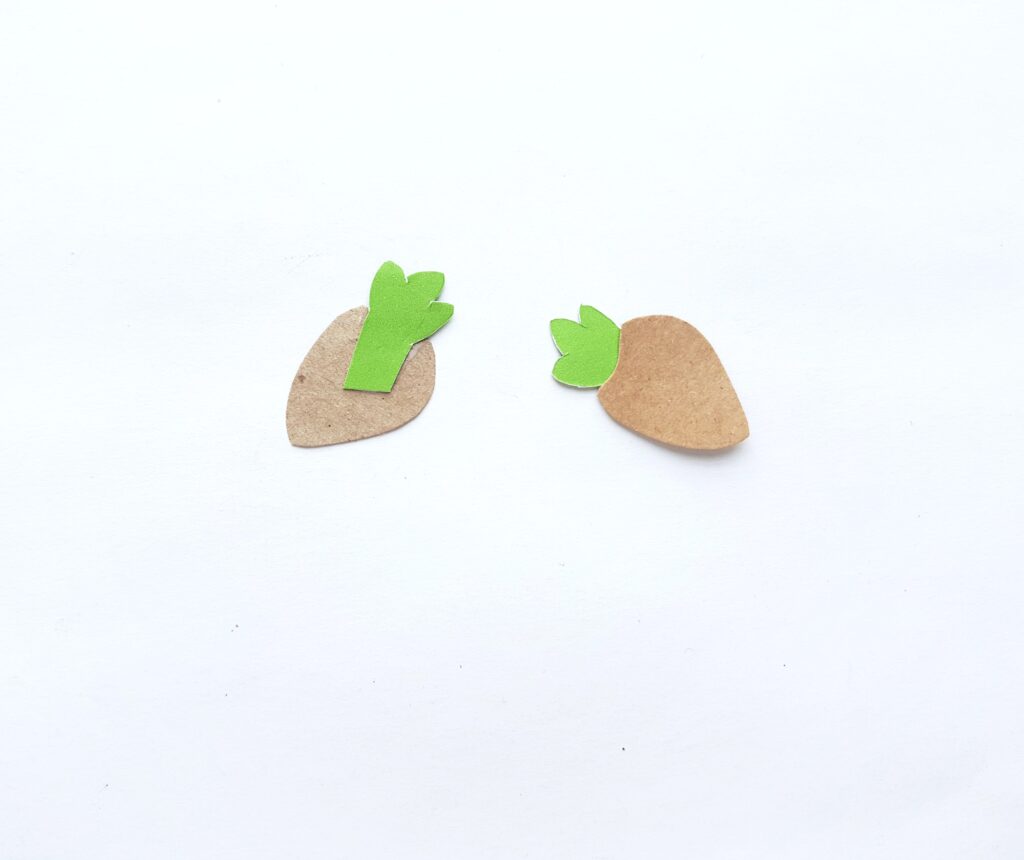
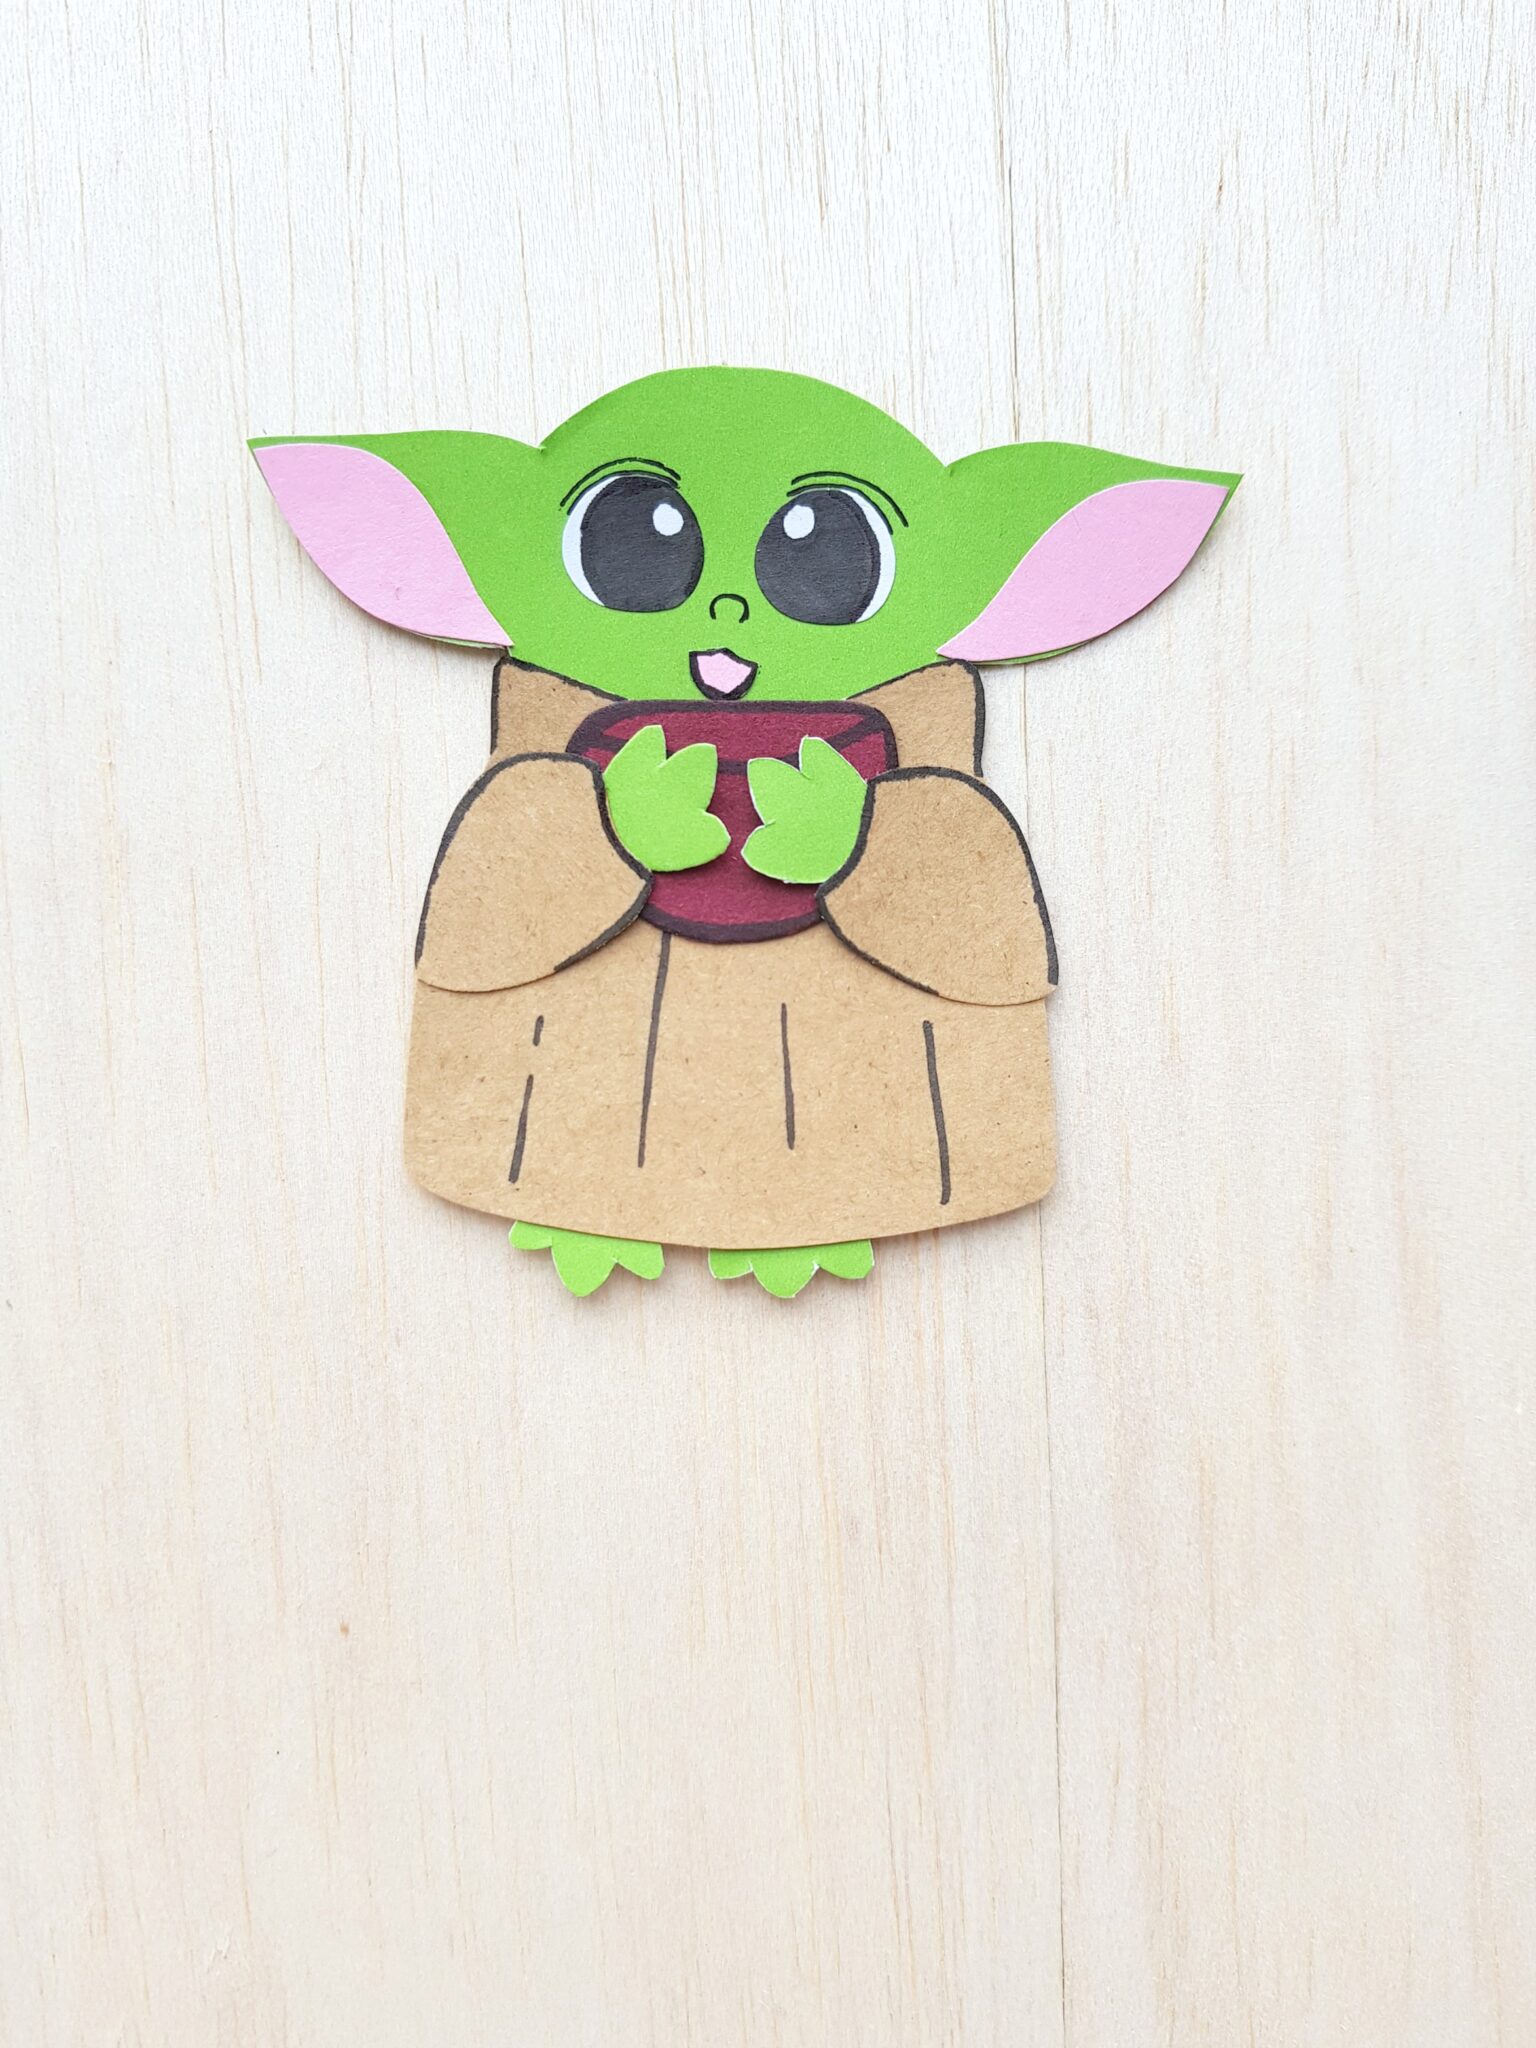
Cut out the mug pattern from a craft paper and slide it in between the hands of Baby Yoda.
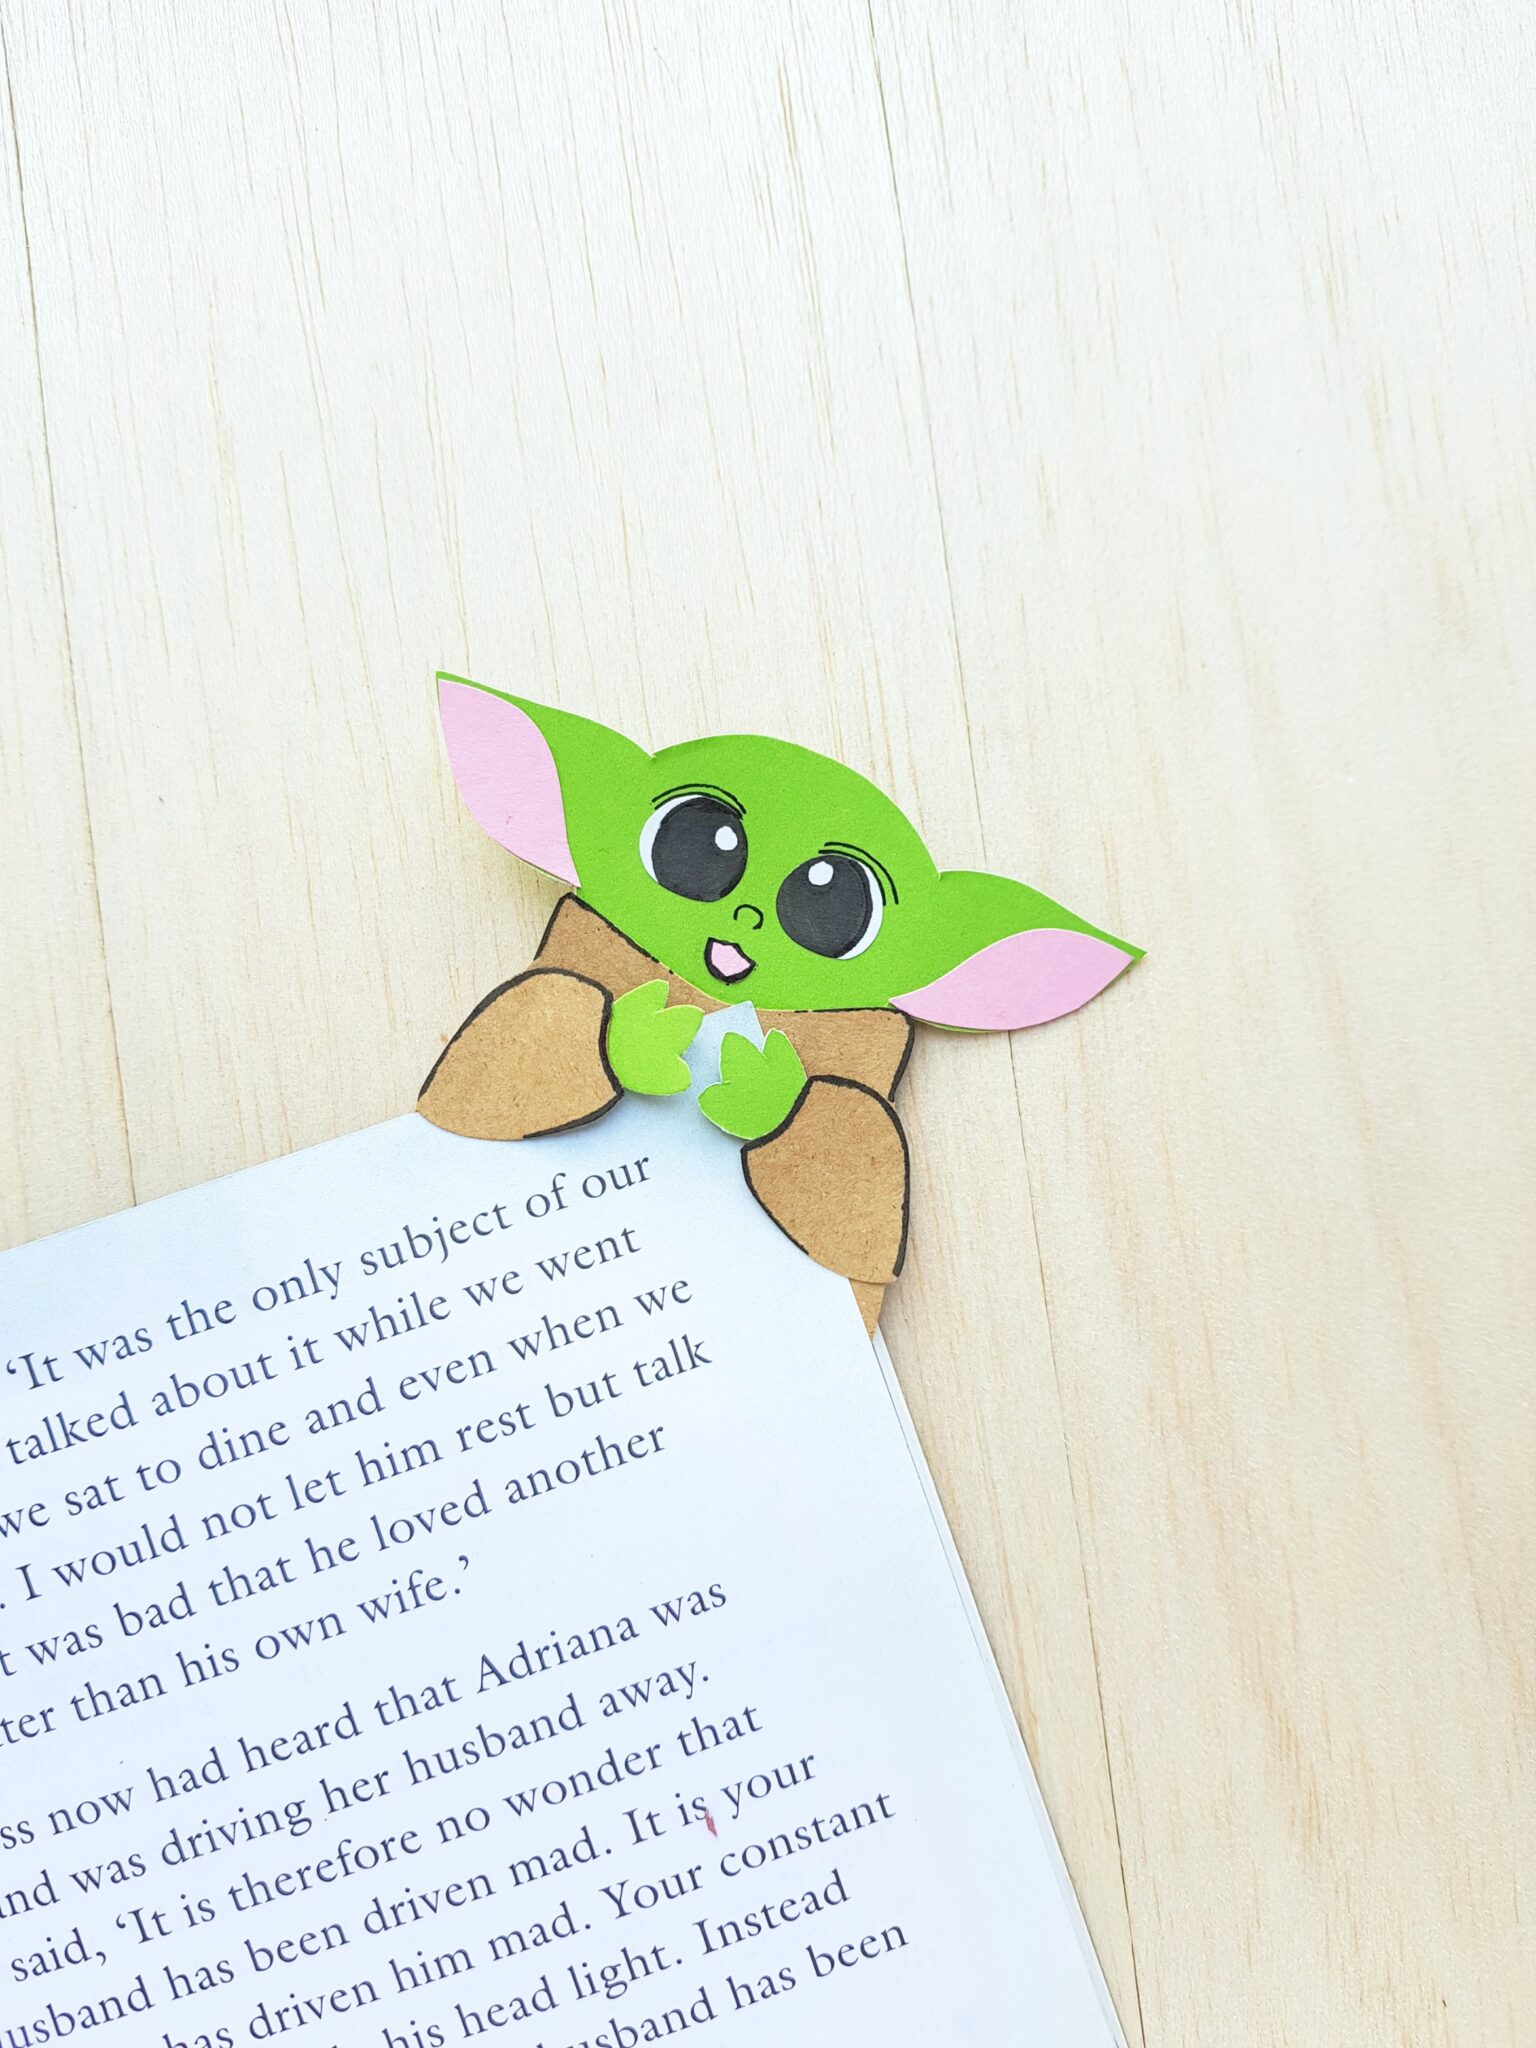
Alternative: Make it a bookmark
Lastly, now that you made this super adorable Baby Yoda aka the Child, you can choose to finish him off with his little cup or make him into a bookmark.
If you choose the latter, you can leave the cup out and don’t glue the arms down completely. That way, Baby Yoda will be able to grab onto the corner of your book pages.
Now you’re all set!
You May Also Like:
Above all, it’s super simple and I think the result is kinda super adorable, no? It’s no wonder he has a song dedicated to him.
Do you have a Star Wars lover that would love this Baby Yoda paper craft or Baby Yoda Bookmark?

pin for later:

Nancy Polanco is a freelance journalist, lifestyle content creator, and editor of Whispered Inspirations. She is a proud Mom to Gabby and Michaela and partner and best friend to Darasak. Having worked as part of a health care team for almost a decade, Nancy is happy to be back to her passion. She is a contributor to the Huffington Post, TODAY’s Parents, and an Oprah Magazine Brand Ambassador.